Choose a Shipper
- American Cast Iron Pipe
- Arconic
- Array Technologies
- Charlotte Pipe and Foundry
- EMJ (Earle M Jorgensen) Schaumburg, IL
- GAF Shingles
- Georgia-Pacific Gypsum Sweetwater, TX
- Gerdau Jackson, TN
- Gold Bond Westwego, LA
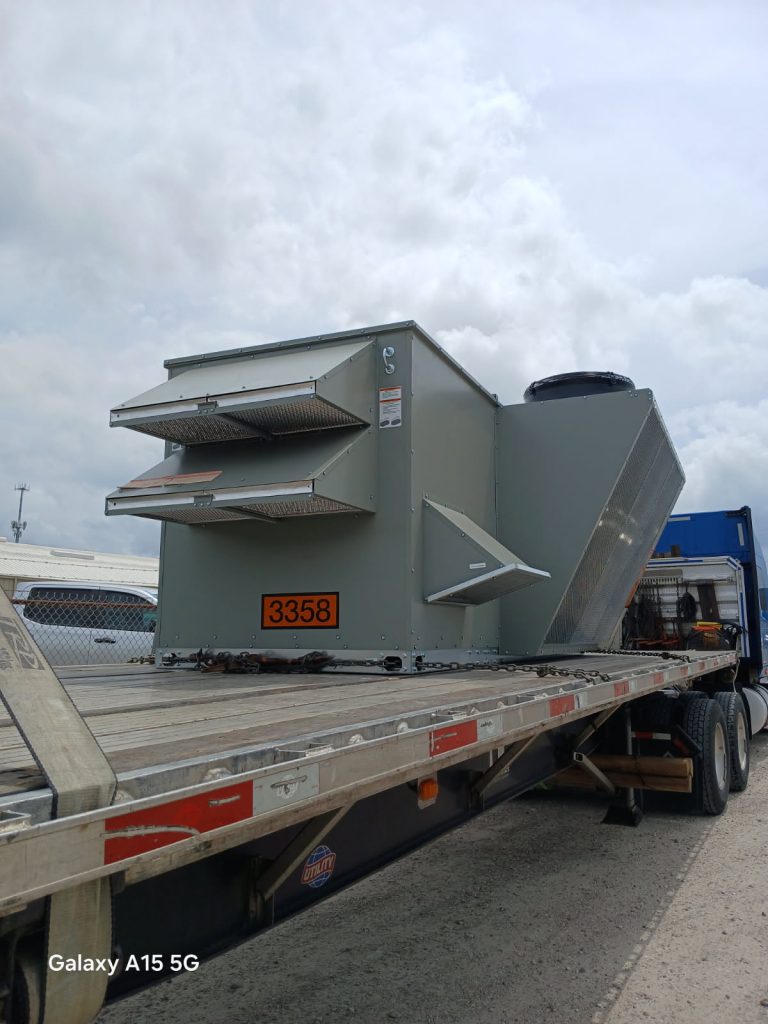
- Greenheck Tulsa, OK
- Hunt, LaSalle, and Bienville Lumber Companies Rules and Regulations
- Metromont
- Nucor Vulcraft Fort Payne, AL
- O’Neal Steel Birmingham, AL
- Outokumpo Calvert, AL
- Port of Panama City, FL
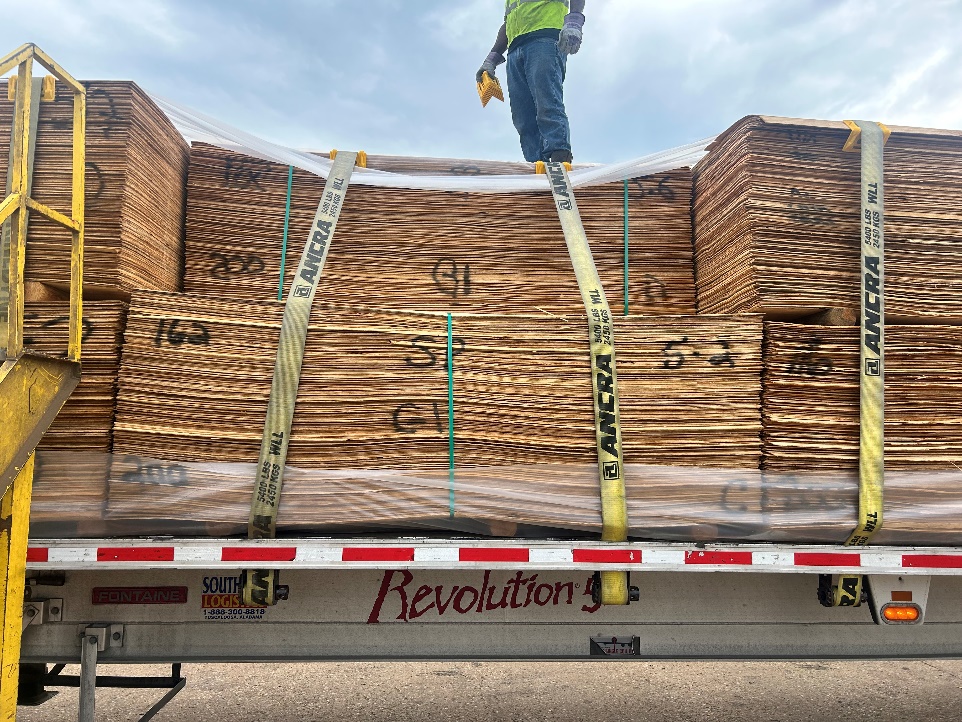
- Scotch Gulf And Lumber Veneer
- Steel Dynamics Columbus, MS
- USG Greenville Ceiling Tiles
- US Gypsum Sweetwater, TX
- USG Otsego Paper Mill
- US Pipe
O’Neal Steel-Birmingham, Alabama
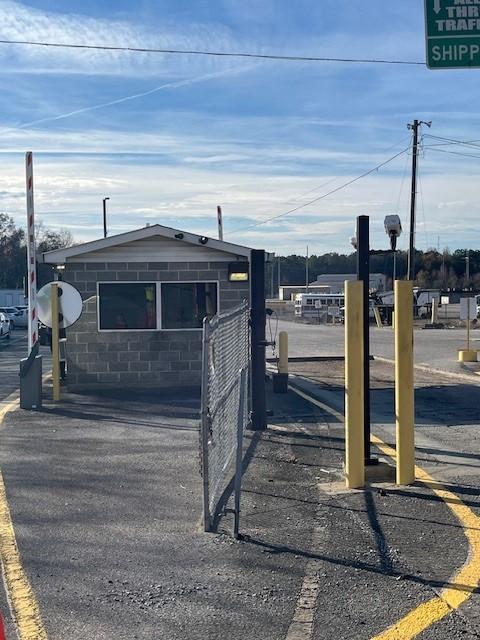
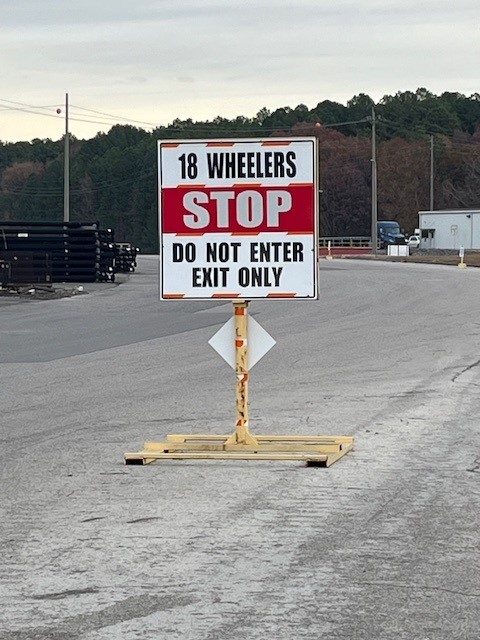
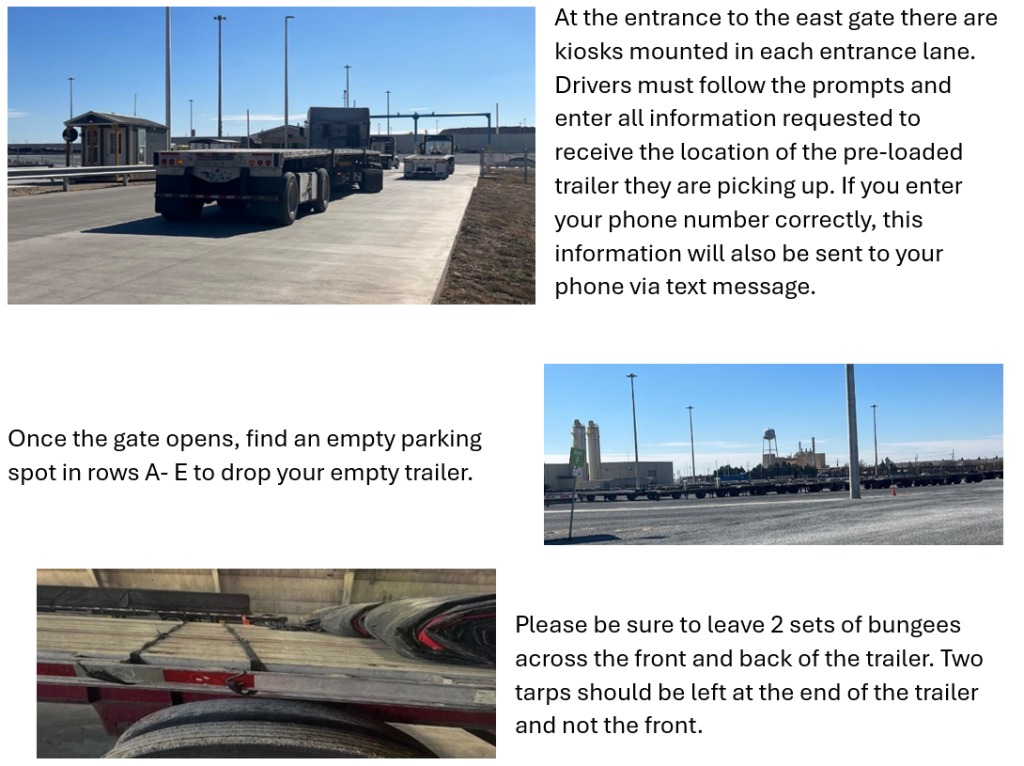
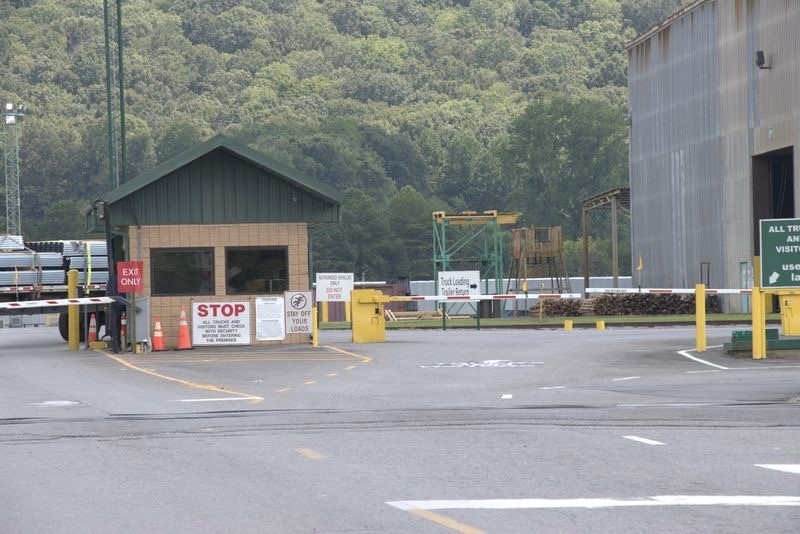
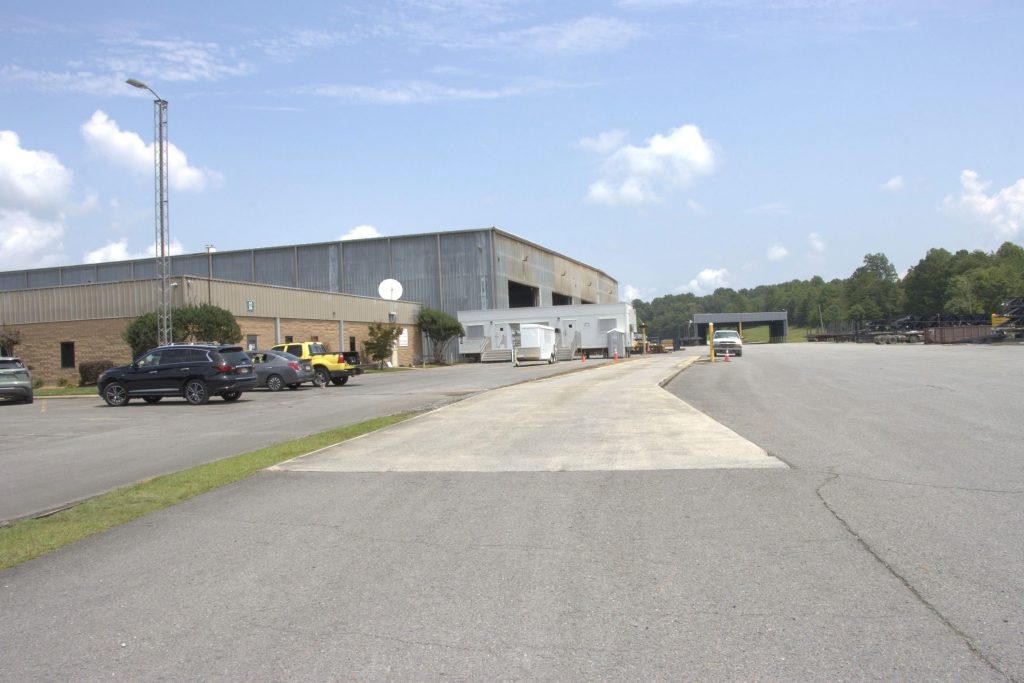
Check in at Shipper
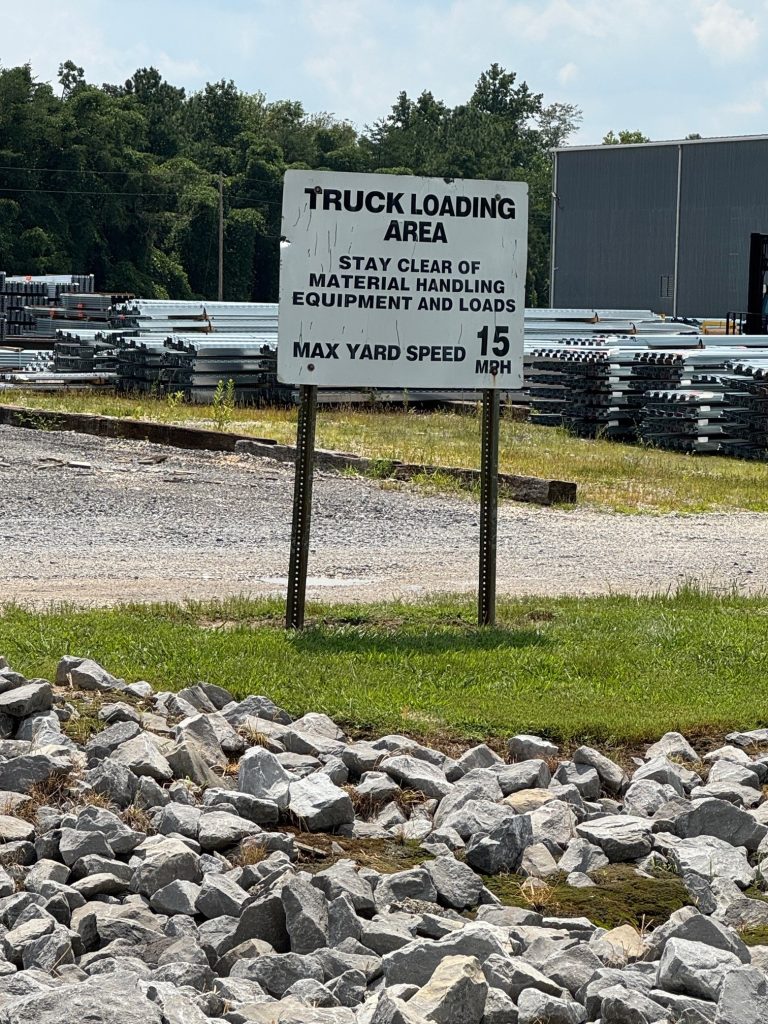
- Check into scale house.
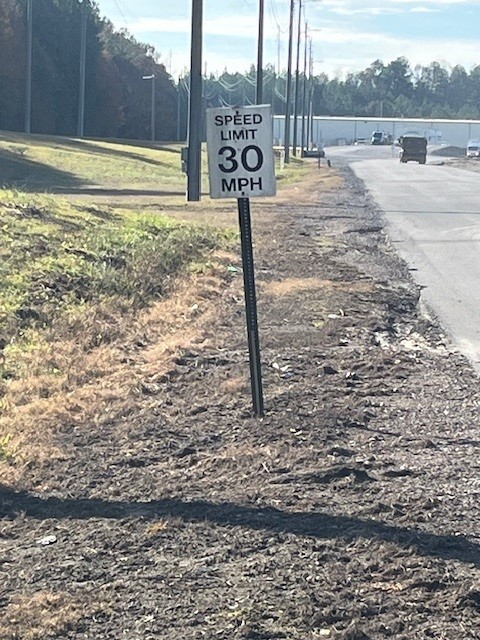
- The speed limit around the scale house is 5 mph.
- Obtain paperwork with trailer number listed.
- Obey all rules posted at entry.
- Speed limit around facility is 15 mph.


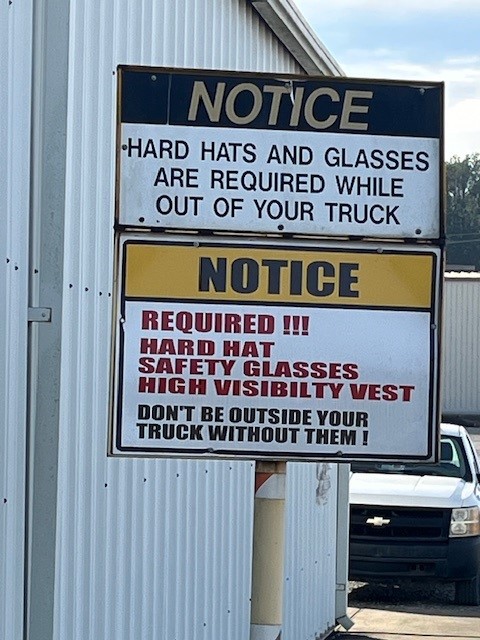
PPE
- Make sure Personal Protective Equipment is worn upon arrival
- This includes but is not limited to the following:
- Hard hat
- Safety glasses
- Safety vest
- Closed toed shoes
- PPE is important when outside the cab of the truck.
- There is lots of other equipment operating at this facility. You need to stay alert and make yourself visible to others.
- Securing freight sometimes occurs next to others. Additional hazards could include others throwing straps and chains near you.
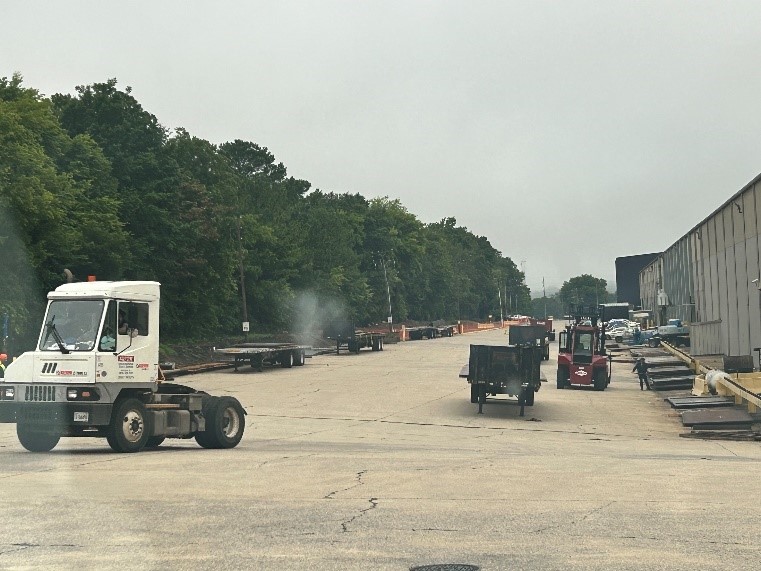

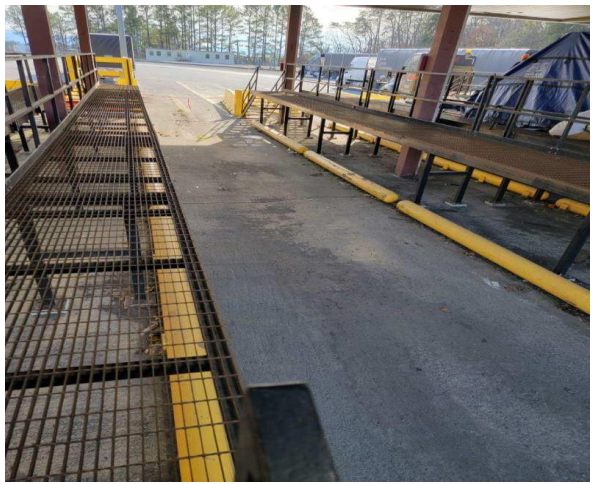
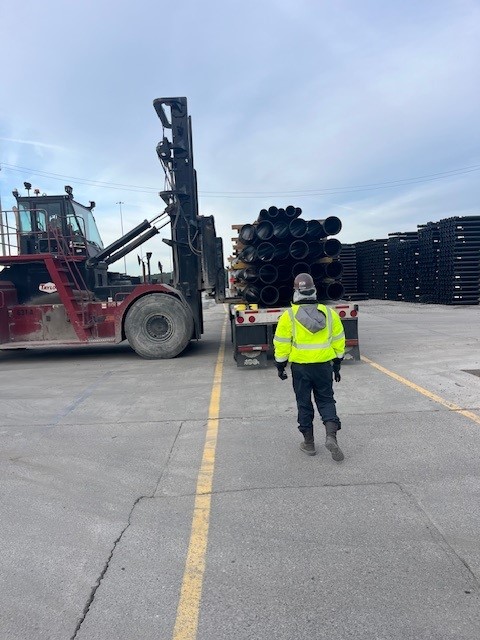
Loading
- Locate trailer at back of warehouse to start securement of freight.
- Walk around trailer and take note of all pieces and how they are situated.
- If additional securement is needed to properly transport, check with onsite personnel.
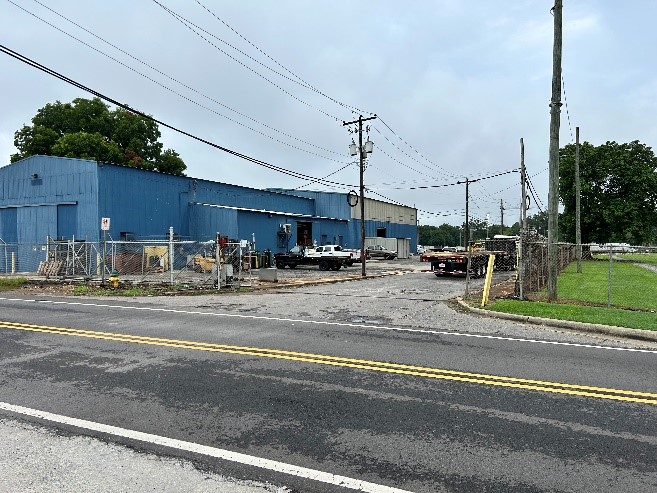
- Additional supplies are located across the street in the blue building pictured below.
- The only equipment not in this location will be the load securement blocks. To obtain additional load securement blocks, visit the scale house at the entrance of this facility.
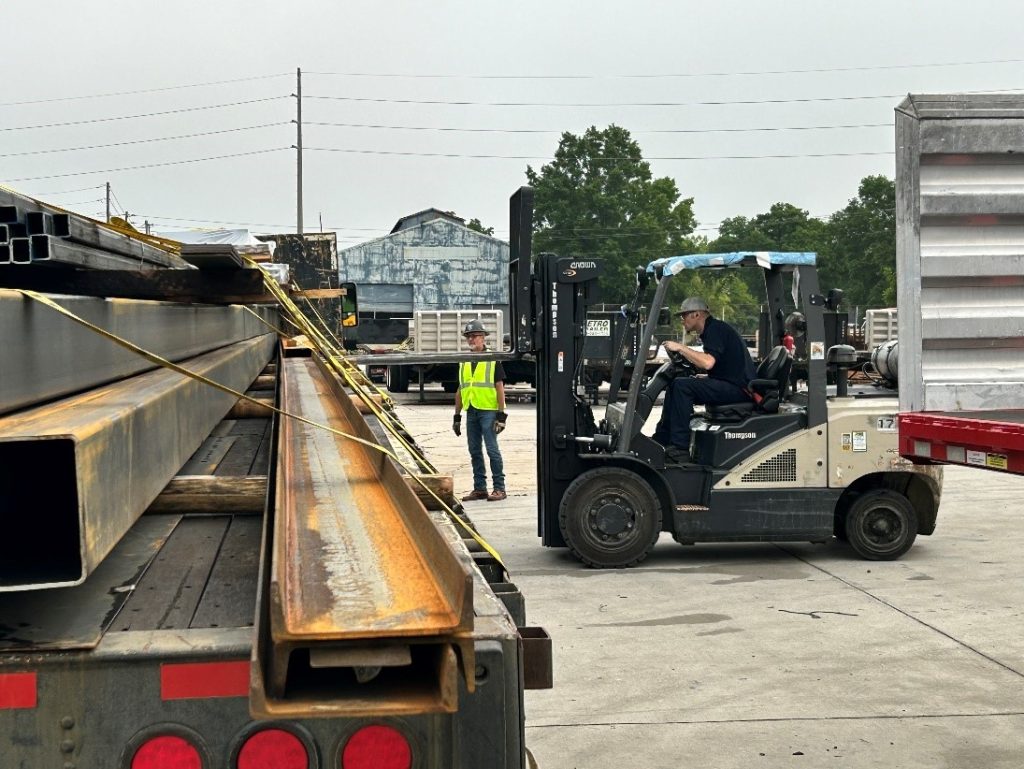
- If the load is unable to be secured safely for transport, the drivers can work with forklift drivers to position in a different way.
- Forklift drivers are available for assistance.
- Communicate clearly with the forklift driver about what needs to be moved.
- Once communication has been established, stand in a safe location and in the site of the operator.
- Straps must be protected with edge protectors.

- Down pressure must be applied to all commodities.
- This can be accomplished by different methods:
- Load blocks
- Load blocks can be positioned differently or stacked to allow for down pressure.
- Weaving straps up and under freight
- You may have to ask a forklift driver to create separation of the freight.

Returned / Refused Material
- Material that is returned to the shipper must be dropped in the securement area and all straps MUST be loosened.


USG Greenville Ceiling Tile
These loads will be pre-loaded.
The preloaded process will be as follows:
- Plastic will be draped over the load, wrapped around the front, and stapled to the pallets on the side of the product.
- This plastic will help prevent moisture from damaging the product.


- Load will be tarped and straps will be placed over the tarp with edge protection.

When you arrive, your load should look like the above product. You should inspect the load.
- Check for any overtightening damage to the product.
- Check under the tarp to make sure plastic is in place and the product is not wet.
- If any damage is discovered, take photos, and call your driver manager immediately.
- DO NOT LEAVE the facility if damage is visible.
Final Securement of load will involve the driver doing the following:
- This load does not have bungees securing tarp. Place bungees on each d ring to prevent tarp from ballooning.
- Bungees should have hook facing outward.
- Failure to bungee tarp properly can result in air getting underneath the tarp and damaging product.


- Straps should be snug but not over tightened.
- This typically involves 1-2 clicks on the winch after being preloaded.
- This product can be easily damaged from over tightening.
- Strap should have a twist to prevent vibration against the product, causing damage.
- This product does not shift easily, so an x strap on this product is not required.
- An X strap on this product could increase probability of a cargo claim.

- Excess tarp
- Any excess tarp in the rear of the load should be strapped down to prevent tarp from flapping in transit.

Delivering of load
- Pull back tarp in sections, so that material is not completely exposed.
Delivering Multiple Stops
- First stops are usually loaded at the rear of the trailer.
- Do not take the tarp completely off, only uncover the material that is to be removed at the current location.
- Taking the tarp completely off will make it almost impossible to re-tarp.
Scotch Gulf and Lumber Veneer
Veneer
- Driver will back into loading dock.
- Plastic will be placed on trailer deck.
- Veneer will be loaded on top of plastic.
- Plastic will then be draped back over the veneer.

- Veneer at base of product should be held up to prevent road grime from splashing onto product.
- This can be accomplished by taking a piece of scrap product and inserting through the plastic and into the veneer. Scrap pieces can be found on the ground inside the warehouse


- Driver will pull out of the loading bay to strap and tarp the product.
- Strapping the load should occur prior to tarping.
- The first section of product should be secured with a minimum of 3 straps.
- All other sections will require a minimum of 2 straps .
- Corner protectors should be utilized.
- Corner protectors will allow maximum pressure on the product.
- APPLY AS MUCH PRESSURE AS PHYSICALLY POSSIBLE!!!

- Driver to tarp the load over the straps.
- Driver will use rolling ladder to access top of load.
- Ladder must be locked into place prior to utilization.
- Personnel protective equipment should be worn.
- Hard hat with chin strap
- Safety glasses
- Safety vest
- Gloves
- Steel toed boots

- Extra caution should be observed while on top of the load. The middle layer may be one stack as opposed to two stacks.
- Load to be tarped and tarp straps should be used to hold in place while transporting.

- Front and Rear should be cross strapped to help control any load shifts.
- Note: Cross straps can be applied under or over tarps.


- Load should be tightened as much as possible.
- Damaging the product because of over tightening is not a concern.
- Load check should occur within first 50 miles.
- Additional load checks should occur with each additional 150 miles or 3 hours; whichever comes first.
This Product is difficult to keep tight.
Frequent load checks and tightening of the load can help prevent shifts and potential claims.
GAF Shingles
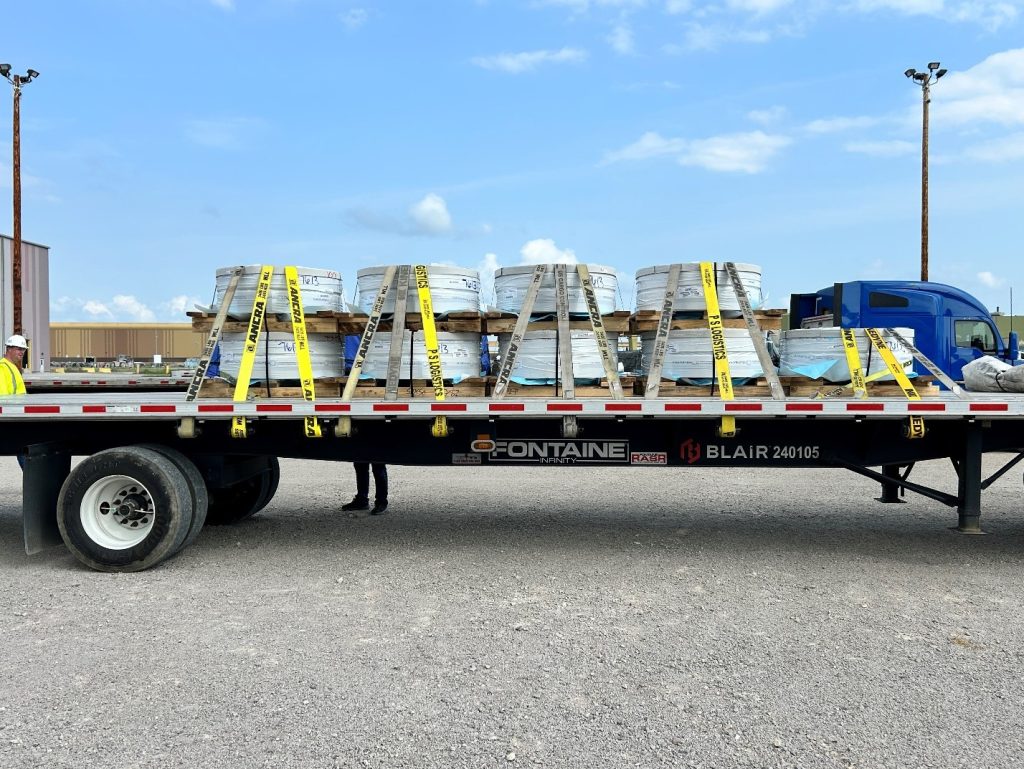
Pallets are loaded onto trailer.
2 straps must be placed on the pallets in the first and last positions.
Cross straps must be placed on pallets that are in the first and last position.
Note:
- All packages must have downward pressure.
- Corner protectors must be utilized
- Note: Avoid overtightening – this may cause damage to the product.
- Check each pallet’s top layer for loose packaging.
- Packet of roofing may have to be positioned in different way to comply.
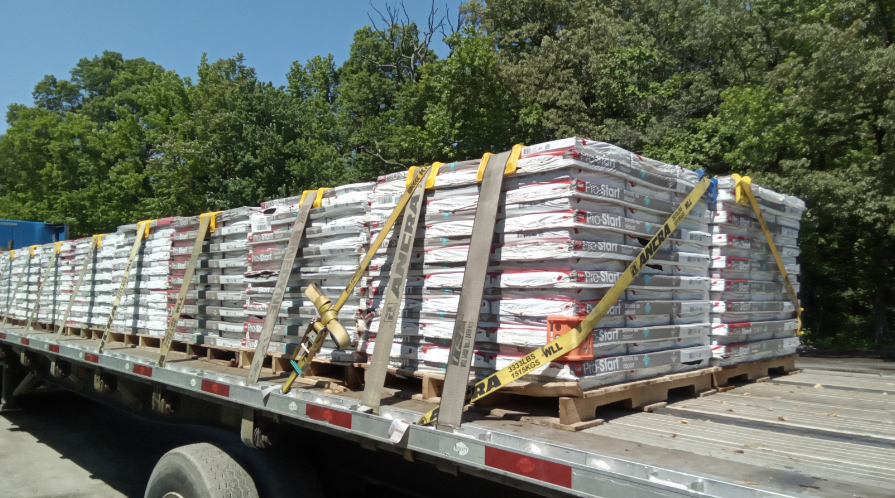
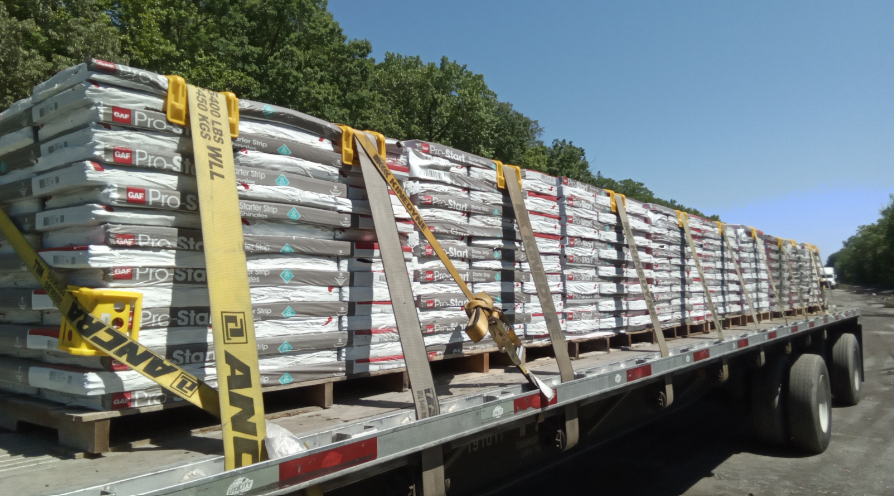
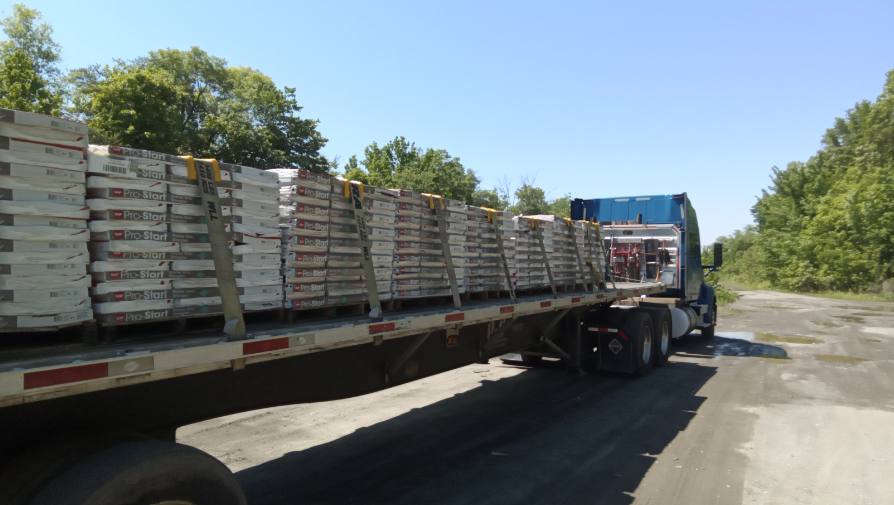
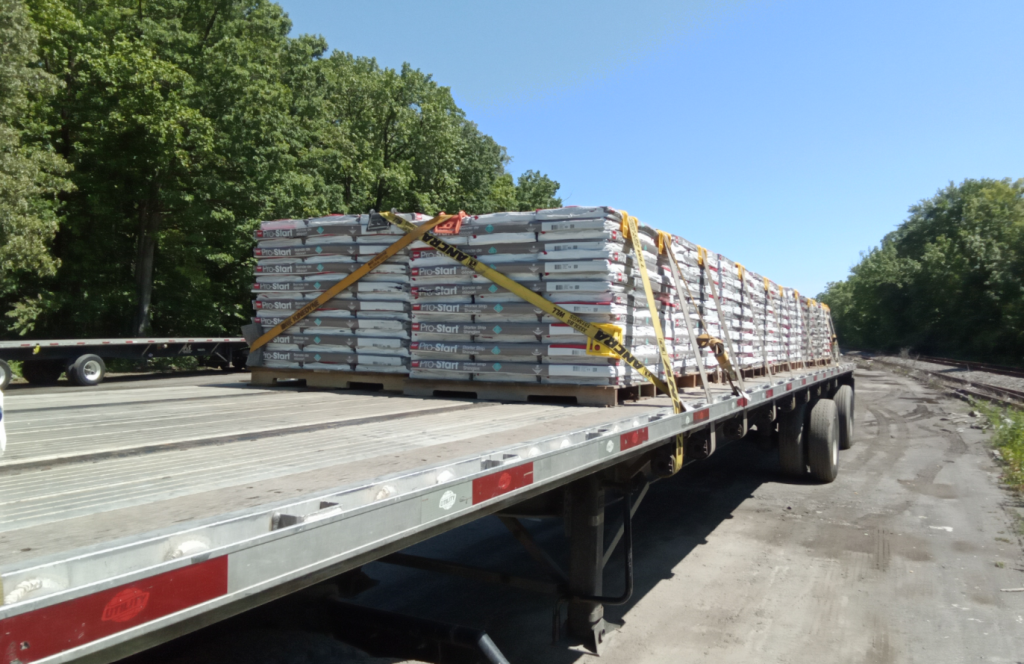
Tarping Requirements:
Load must always be tarped when picking up before the weekend and delivering after the weekend. This is mandatory to deter any theft of the product.
Array Technologies
Solar Tracker Parts
- Edge protection must be used on this product to prevent damage to the straps
- Two straps to be placed on the front and rear pallets.
- Pallets with boxes on them must be tarped.
- It would be best to position these in the first position.
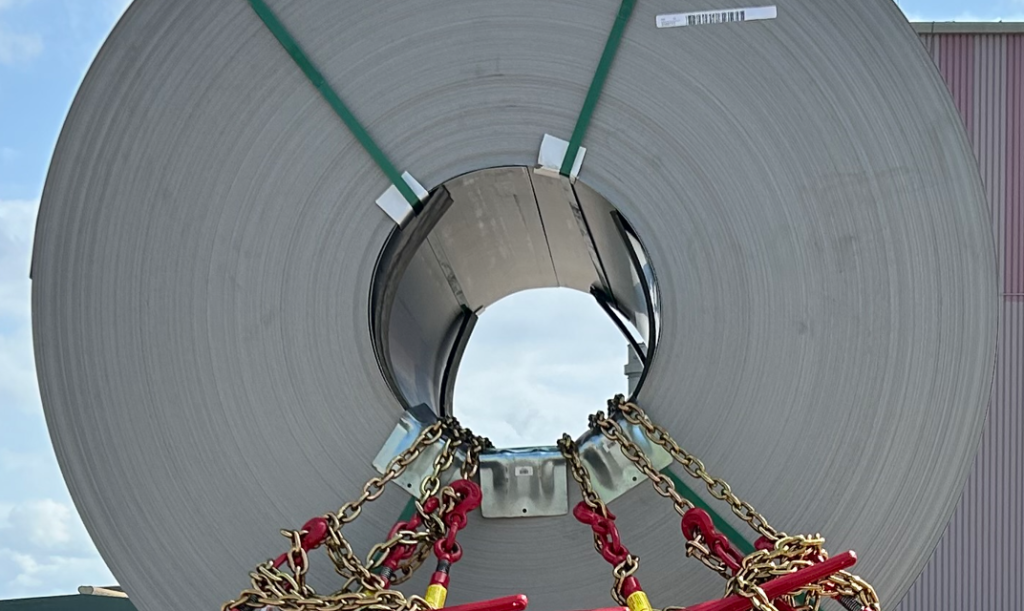
Outokumpo Coils – Suicide and Eye to the Sky
Coil Eye Crosswise (Suicide)
- Set up with rubber matt under coil racks and on timbers
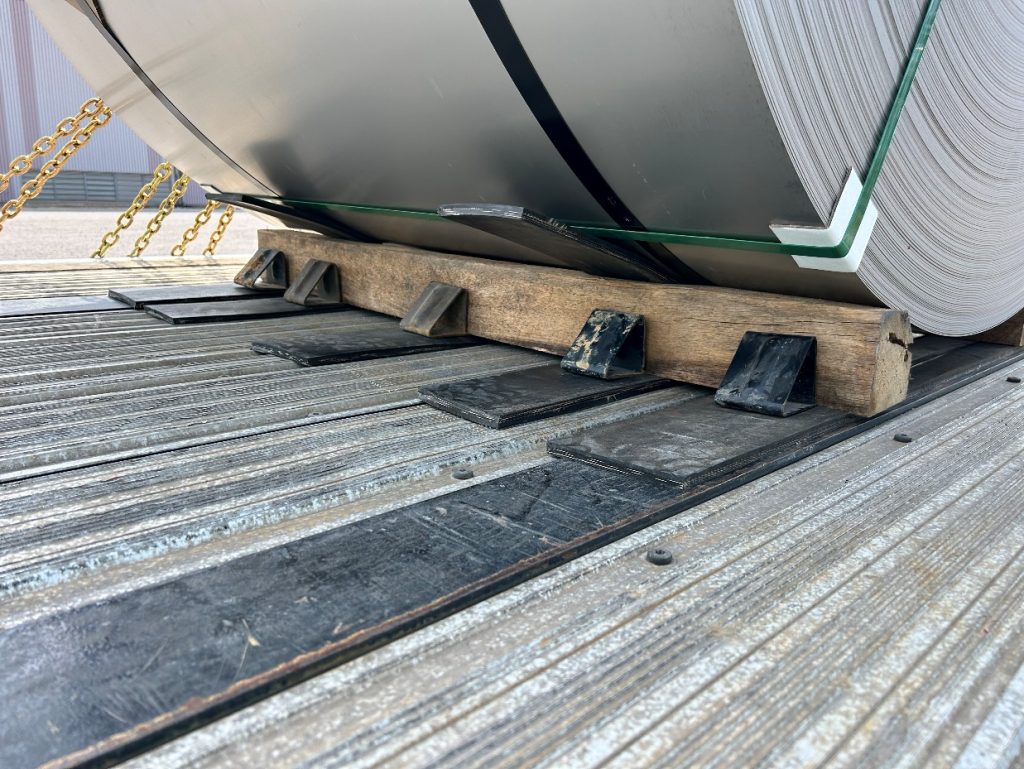
- Rubber Mats on inside of coil along with metal edge protectors to protect coil
- Chains hooked to the appropriate location on trailer (Most trailers are designed for chain to be tear dropped around spool and back to chain)
- Chains should be pulling down at appropriate angles.
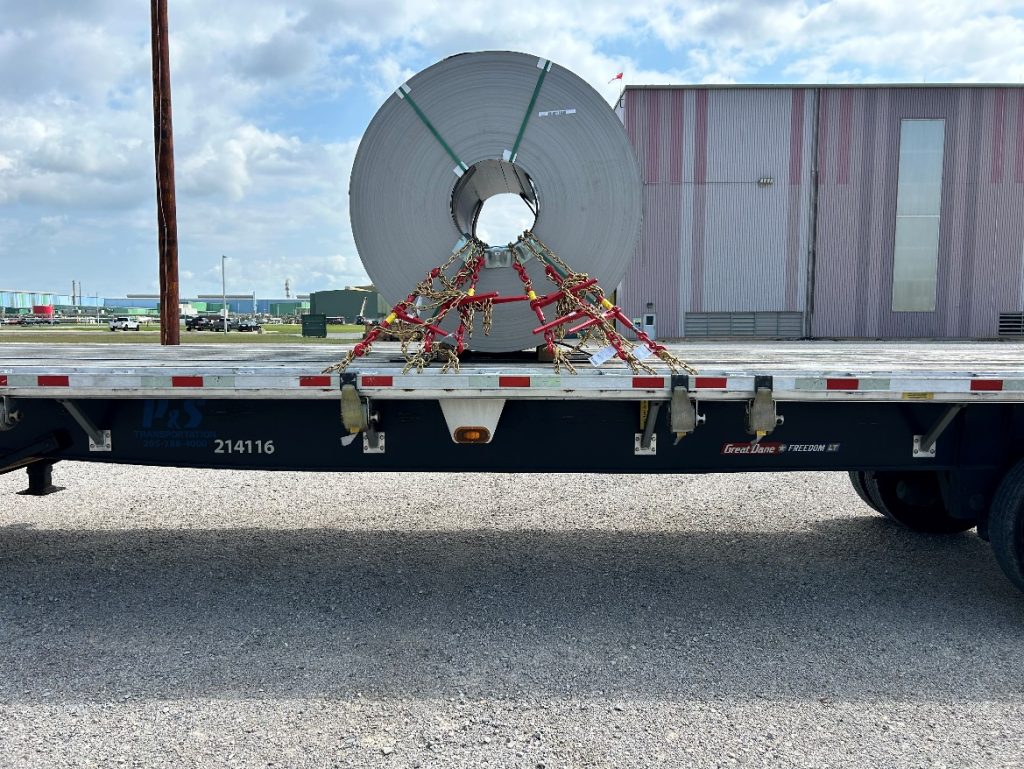
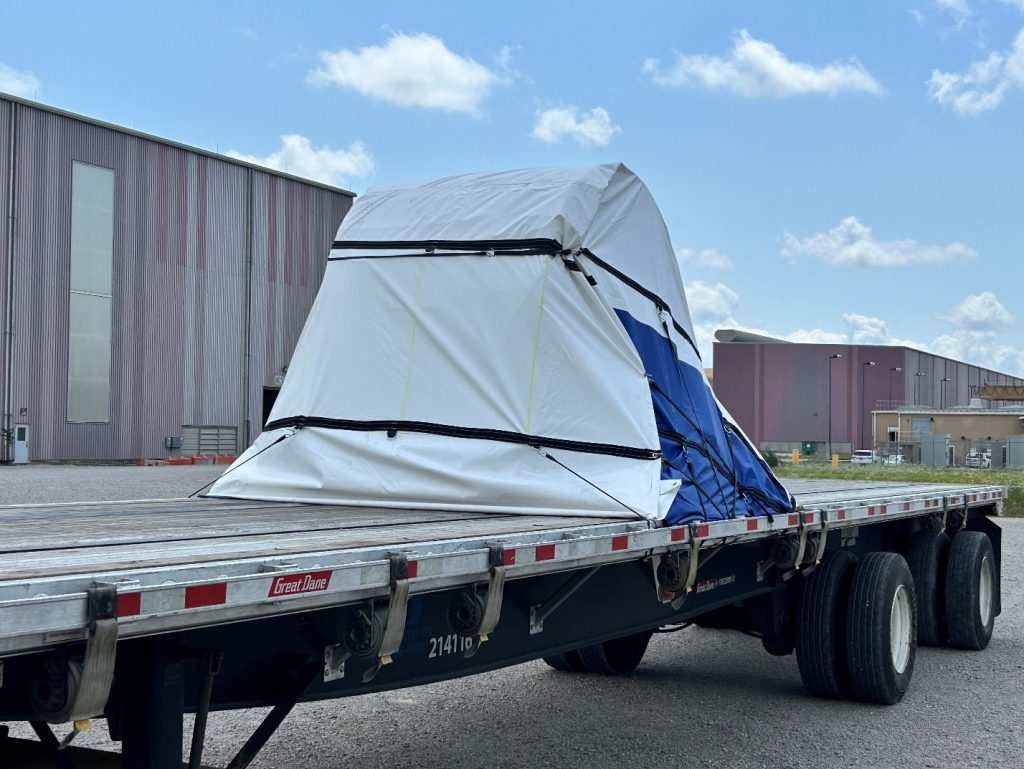
- Tarp load to prevent wind from damaging the tarp and exposing the product.
Coils Eye Vertical (Eye to the Sky)
- Place a strap down the middle of each coil.
- Place two straps over the top of each coil in an x pattern.
- Place a trip strap on the front and rear coil to prevent forward and rearward movement. Trip strap should go under the banding.
Metromont


- Scope and Application
- Definition of Responsibilities
- Equipment
- Product Handling and Shipping
- Loading and Delivery
- A-Frames
- Lay-Down Racks
- Flat on Trailer / Deck Walls
- MetroDeck
- Double Tees
- Stadium Stairs
- Columns
- Oversize Loads
- Drop Lot to Erection Site
- Metromont CDL Drivers Checklist
SCOPE AND APPLICATION
This manual will outline procedural requirements for the shipping of precast concrete pieces produced at Metromont precast facilities. It is intended for use by all CDL drivers to ensure units are handled properly, efficiently, and safely. Due to the wide variation in size and shape of precast units, not every conceivable handling consideration will be specifically addressed in this document. This guide is therefore intended to provide general information only, with the understanding that unusual units be reviewed on a case-by-case basis by the facility management and/or Engineering department. When in doubt, consult a supervisor or manager. It is also important that supervisors and managers provide adequate training to employees in the methods and application of the handling requirements as well as the safe and proper use of all related equipment.
- To ensure your safety and the safety of the motoring public, the following guidelines have been established.
- SAFETY is Paramount with all equipment, loads and movements.
- As a professional driver, you know the importance of delivering the right quantity of the right product to the right job site safely, damage-free and on time.
Why cargo securement is important:
- The customer trusts you to pick up and deliver the product on time, and damage free.
- Other motorists trust you won’t put them at risk for crashes, injury or worse, due to unsecured, falling and shifting cargo. Safe and responsible cargo securement will help you and our organization build a positive public image that reflects safe and professional employees.
- Your company trusts you to prevent costly cargo claims and incidents due to improperly secured freight.
Tractors, flatbeds, and extendable trailers must, when transporting cargo, be loaded and equipped to prevent the shifting or falling of cargo. Loads must be secured to conform to the provisions of the Federal Motor Carrier Safety Regulations.
Ensure every load is properly secured.
The rules of securement are located in the Federal Motor Carrier Safety Regulations book section 393.100 thru 393.136.
Please take time to read these sections.
DEFINITION OF RESPONSIBILITIES
Each department plays a crucial role in the safe and efficient handling operation of the precast units. The following list outlines the basic responsibilities of the various departments involved.
Engineering (Project Coordinator and/or Engineering Manager)
- Coordinates with other departments to develop detailed handling procedures for each unit.
- Provides maximum size or weight limits for racks, frames and other storage elements.
- Responds to engineering related handling or shipping questions from other departments.
Safety Department
- Conduct regular safety reviews to ensure that the storage, loading, handling, and shipping of precast units are performed safely and in compliance with applicable State and Federal regulations and company policies.
- Report findings to Facility Management.
- Review and report on regulatory updates including DOT and OSHA.
- Conduct quarterly safety meetings with drivers to address any shipping, loading, and safety related issues.
Loading (Loading Foreman)
- Loads panels and readies trailers for shipping according to handling instructions.
- Corrects unacceptable loading conditions immediately as identified by the driver or Quality Control Inspector.
- If unsure what to do, request additional information from the Engineering Department.
- Marks load list with racks required and special dunnage requirements.
- Makes sure racks are secured properly.
- Verify all sticks of dunnage are nailed to the trailer. All dunnage that is stacked should be nailed down to dunnage beneath it to prevent movement.
- Verify that the product is supported properly and is adequately shimmed to distribute the load on all support points.
Delivery Scheduling (Dispatcher)
- Coordinates with erector to provide delivery sequences to Loading Foreman with adequate lead- time.
- Establishes shipping route, including verifying clearances under all bridges.
- Obtains proper permits as required.
Transportation Manager
- Trains all drivers in proper load securement requirements.
- Monitors, audits, and enforces all cargo securement procedures.
- Ensures that all applicable DOT regulations and guidelines are met.
- Ensures that drivers inspect all cargo securement devices on a regular basis to ensure that they meet applicable DOT requirements.
- Responds to any driver concerns regarding proper cargo securement.
- Ensures that drivers have planned routes and proper access to job sites and/or drop lots.
- In conjunction with the Safety Department conducts quarterly safety meetings with drivers to address any shipping, loading, and safety related issues.
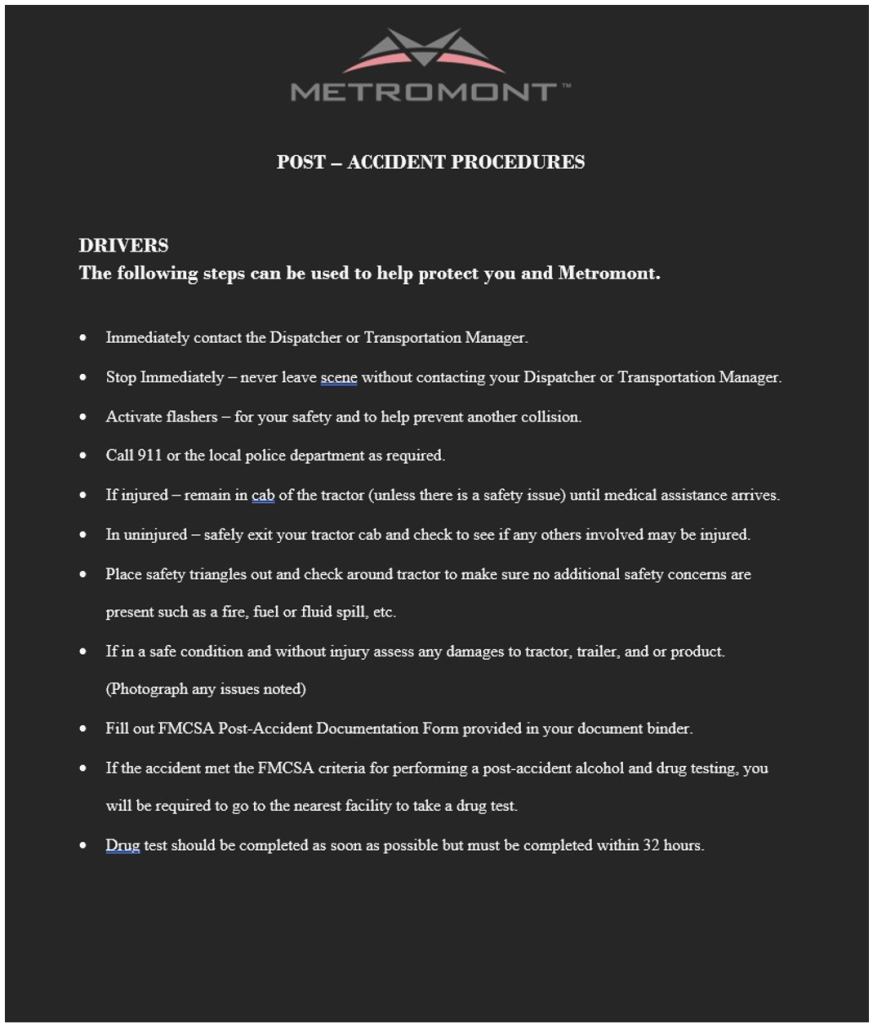
Shipping (Truck Driver)
Pre-trip:
- Verifies upon acceptance of the load that DOT regulations for length, width, height, and weight limitations are satisfied.
- Ensure proper flags, banners, beacon light, escorts and permits are used for wide loads as required.
- Consults with Loading Foreman prior to departure if questions concerning the load arise.
- Secures the load in accordance with all applicable DOT regulations and company policies.
- The national safety code states that all drivers shall stop and check their load within the first 50 miles & then again, every 3 hours or every 150 miles, whichever comes first.
- Travel is authorized 7 days a week from sunrise to sunset. Sunrise and sunset are determined by the time published by the United States Naval Observatory according to the vehicles current location.
- Only legal loads can be transported without time restrictions.
At the jobsite:
- Reports any shipping issues, shifting of loads, damaged equipment, and accidents immediately to their supervisor. This includes trailers and products stored on drop lots.
- When unloading symmetrical loads, the second piece must be secured to the rack and the landing gear must be down before unloading the first piece.
- Prior to leaving the jobsite, ensure that empty racks are secured to the trailer bed with chains in addition to the racks being bolted to the pockets.
- No one is permitted to be directly under suspended loads or within the fall zone of the suspended load.
- Cargo securement devices (chains) shall not be used for lifting.
- When returning with an empty trailer, ensure all dunnage is secured properly and returned to the plant.
*** The driver ALWAYS has the responsibility to refuse to accept any load that he/she deems unsafe or is otherwise not in accordance with DOT or generally accepted shipping regulations until a qualified person has determined that safety has been assured. ***
EQUIPMENT
Various pieces of equipment including racks, chains, and/or rigging are utilized during the handling and shipping of precast units. These are broken down into the following categories.
Shipping Racks
Racks are used to support precast units and to ensure they are stable while secured to the trailers. Not all precast units require the use of racks. The three basic types of shipping racks are:
- Steel A-frames (offset or rail to rail)
- Bicycle/Pipe Rack
- Lay-down
- Rack Trailers
Trailers
Trailers are used to haul precast units either around the plant or from the plant to the job site. In all cases, the maximum weight and length limits for each trailer type must not be exceeded. There are five basic types of trailers.
- Flat Bed
- Low boy
- Step (“Drop”) deck
- Stretch / extendable
- Wall Panel Trailer
The driver is required to visually inspect all trailer connections including the 5th wheel and trailer pins to ensure that they are properly locked and secured.
Dunnage (Loading Department)
Dunnage is the general term used to describe that material which separates precast units from storage supporting elements such as steel, concrete, or wood.
- In the event of ice, sleet, or snow make certain that dunnage sits on a section of the trailer bed that is as dry and clear as possible to reduce the chance of slippage.
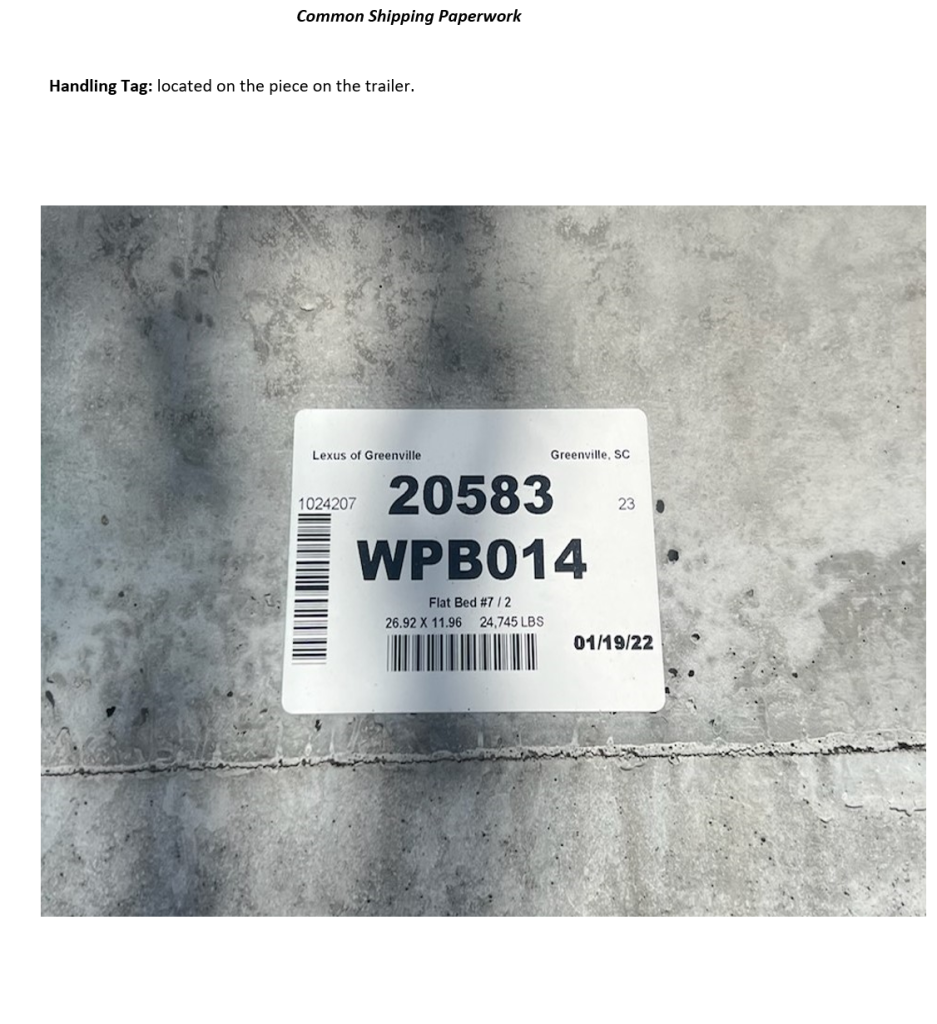
- Dunnage is placed as illustrated on the Handling Tag.
Transport Chains
Transport chains are used to secure precast units to trailers or racks. All required chains will be selected and provided by the company. Transport chains are Grade 70 chains. Grade 70 is extremely strong and lightweight and is used primarily for load binding in the transportation industry. The high strength to weight ratio of Grade 70 is achieved by special heat treating. Grade 70 meets all applicable State and Federal requirements. Note: Grade 70 chains are NOT to be used for rigging panels for lifting.
Header Chain (aka forward-motion chain; trap chain)
FMC REG 393.114 (c) The front-end structure must be capable of withstanding the following horizontal forward static load:
(1) For a front-end structure less than 6 feet in height, a horizontal forward static load equal to one-half of the weight of the articles of cargo being transported on the vehicle uniformly distributed over the entire portion of the front-end structure that is within 4 feet above the vehicle’s floor or that is at or below a height above the vehicle’s floor at which it blocks forward movement of any article of the vehicle’s cargo, whichever is less.
Part (e) Substitute devices. The requirements of this section may be met using devices performing the same function as a front-end structure, if the devices are at least as strong as, and provide protection against shifting articles of cargo at least equal to, a front-end structure which conforms to those requirements.
The load must be protected from forward movement. The chain must be in contact with the front of the load or a part of the load that will stop forward movement.

FMC REG 393.110 (d) Special rule for special purpose vehicles. The rules in this section do not apply to a vehicle transporting one or more articles of cargo such as, but not limited to, machinery or fabricated structural items (e.g., steel or concrete beams, crane booms, girders, and trusses, etc.) which, because of their design, size, shape, or weight, must be fastened by special methods. However, any article of
cargo carried on that vehicle must be securely and adequately fastened to the vehicle.
- Using the required number of chains to satisfy the weight ratings is still required.
- This rule is why we don’t have to have securement every 10’ feet.
- We still must meet the chain weight ratio.
- Our chains are (5/16th grade 70) 4700 lbs.WLL
- We must have at least one chain at every point of dunnage.
- 5 dunnage points minimum of 6 chains. (with header chain)
- 4 dunnage points 47000 lbs. minimum of 5 chains.
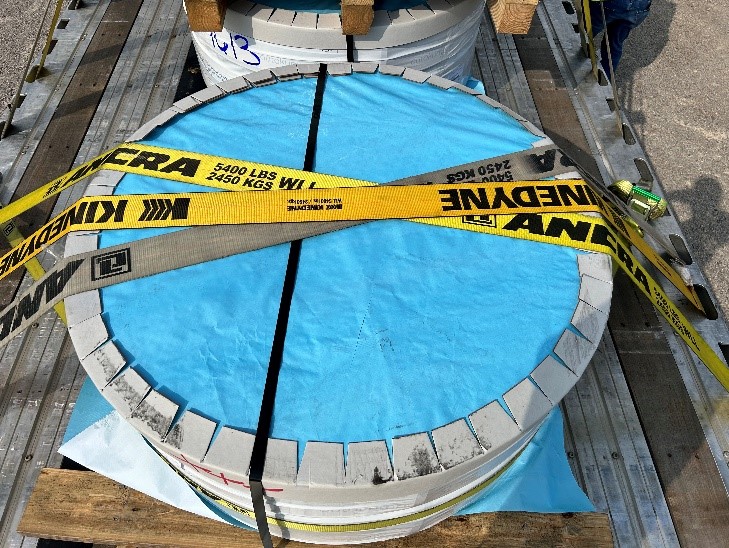
Grade 70 Chain Working Load Limits (WLL)
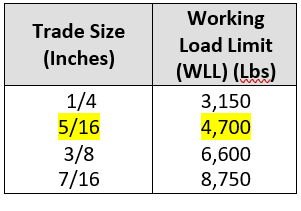
Stake pockets at 5,400 lbs. WLL will control the WLL of 3/8” and 7/16” chains. Note: 5/16” chains are generally used for tie down.
The following chart shall be used to determine the number of 5/16” Grade 70 chains required to tiedown the load:

NOTE: Two (2) chains minimum are required for all loads up to ten (10) feet in length. One (1) additional chain shall be added for each ten (10) feet over the original. Precast product designs may not allow you to equally space the chains; however, you must use the number of chains required in either Table 1 or Table 2, whichever quantity is greater.
- Stake pockets are rated for 5,400 lbs. WLL.
- Do not exceed one (1) chain per pocket. Do not chain to the rub rail.
- The chain used to secure a panel from lateral movement shall be in addition to the number of chains required to comply with DOT regulations.
- Chains are to be tight but NOT over tightened to the point that they damage the product.
- A minimum of (1) 5/16” chain at a 2:1 angle shall be used on each piece to restrict forward
- motion.

- Chains & binders shall not be loaded more than the working load limit as provided by the manufacturer.
- Ratchet binders are the only binders to be used to secure loads. The use of lever/snap binders is prohibited.
- Binders should always be connected to chains and never directly to the stake pockets.
- Before operating any binder, the user shall secure their footing on the ground to prevent slipping or falling. In adverse weather conditions, including freezing temperatures, additional caution should be exercised.
- Binders shall be matched with the equivalent grade of chain. Using the wrong grade of binder or chain may reduce the assembly WLL of the securement system.
- Chains & binders shall be checked periodically and adjusted during transit to maintain proper tension.
- Chains & binders designed for load securement are not approved for overhead lifting applications. Products for lifting require certification.
- Regulations require that each tie down be attached and secured in a manner that prevents it from becoming loose, unfastened, opened, or released while the vehicle is in transit. Latches, chain wrap, and/or other means should be used to secure binders and chains.
- Plywood forms shall be used any time a ratchet binder meets concrete to prevent damage to the concrete piece.
- Environmental Considerations:
- Chains & binders are subject to dirt, mud, snow, ice, road salt, cleaning solutions, etc. Binders shall be cleaned and lubricated as needed to ensure proper operation.
- Chains & binders not in use shall be stored properly and in a rack.
- If either have mud, snow, ice, etc. in the gear or pivot points, they can be gently struck with a hammer to break loose and remove any foreign material. Care should be taken with binders manufactured with cast parts as striking with a hammer especially in sub-freezing temperatures may cause the binder to break and result in possible injury from flying pieces of material. Eye protection shall be always worn when striking binders with a hammer.
- Inspection:
- Initial inspection shall be made before a binder is placed into service to ensure the binder is being used for the application and that it matches the chain grade being used as closely as possible. Capacity shall be based on the lowest working load limit (WLL) of all load securement components (stake pockets, racks, binders, chains).
- Chains & binders shall be inspected prior to each use.
- Removal from Service:
- A binder shall be removed from service if any of the following conditions exists:
- Links that are bent, gouged, distorted, stretched, cracked, or worn (see wear allowances per manufacturer).
- Evidence of welding on any component except for the initial factory production welds.
- Gear is worn, chipped, or cracked.
- Markings are missing, incomplete, not legible, or incorrect.
- Excessive rust.
- End fitting threads that are worn, bent, distorted, or will not turn.
- Bent or deformed handle.
- Swivel sockets or ball worn or deformed
- Chains shall be removed from service if any of the following conditions exist:
- Hooks that are worn, bent, distorted, twisted, stretched, or cracked.
- Links that are bent, gouged, distorted, stretched, cracked, or worn (see wear allowances per manufacturer).
- Evidence of welding on any component except for the initial factory production welds.
- Markings are missing, incomplete, not legible, or incorrect.
- Excessive rust.
PRODUCT HANDLING AND SHIPPING
General
From the time a precast unit is stripped out of the mold to the moment it is unloaded at the job site, several handling steps are involved. For each step, it is imperative that systematic and well thought out procedures be implemented. In general, the number of times a unit is picked and handled should be kept to a minimum.
There are basic handling steps that a precast unit undergoes between casting and erection: stripping, plant-to-yard hauling, yard roll-up (when applicable), yard storage and shipping. In all cases, it is crucial to ensure the proper equipment, rigging, chains, and related devices are used to secure the unit.
It is also important that early handling coordination occurs between engineering, production, yarding, and shipping to ensure that the most efficient and safe handling methods are used. When questions or discrepancies arise concerning how a piece should be handled or shipped, the Engineering Department shall be consulted.
Precast Stability and Securement
Precast concrete units in storage or in transit shall always be Stable, Secure and Safe.
It is the responsibility of Engineering, Production, Loading, Quality Control, Haul, and Safety to collectively ensure that these criteria are met. While the individual responsibilities of each department vary, each plays an important role in achieving these goals.
Stable –
Stability means that when subjected to a given load, the precast will remain in the position it was originally placed. The kinds of loads a panel is subjected to could be wind, gravity, accidental impacts, and the forces imposed from braking and acceleration.
Stability must be achieved and always maintained – whether a panel is at rest in the yard or
being hauled around on a trailer. The following are used to achieve and maintain stability:
Use of frames or racks –
Frames or racks can help stabilize a precast unit by preventing it from tipping or sliding. Provided the frames are themselves secure, the precast units in the following cases are unable under most load conditions to shift out of position either by tipping or sliding. If inclined racks are used during the shipping of precast units, additional chains may be required to prevent tipping of the panel away from the frame, as shown in the sketch.

For short, low profile precast elements, it is not always necessary to use racks to make the pieces stable. The lower a unit is to the ground the less likely it will be to tip. As a general “rule of thumb”, if a precast unit has a height to width ratio less than 2 to 1, it might not require a rack. All panels that exceed the 2 to 1 ratio shall be supported on racks or frames, unless expressed written consent by engineering is given.

Secure –
A precast unit is secure when it is integrally fastened to the trailer or frame on which it rests. For product in transit this means that the panel is incapable of physically coming off of the trailer.
Securing a panel to a trailer means locating frames or jacks at the proper location from each end of the units and ensuring the chains, frames, trailers, and ratchet binders are properly sized and in good working condition. Racks or frames shall be secured to the trailer with ¾” coil rod passing through the rack, trailer stake pockets, a piece of 3″ channel and (2) nuts jammed together. Chains placed over the panels and hooked onto the stake pockets on each side of the trailer will then ensure the precast unit is secured to the frame. Softeners are placed as required to protect the panel before the binder is tightened by the screw vice. See also Appendix D for specific requirements and load limits for chains. The use of lifting loops, erection anchors, and conduit pockets may be used to secure the load.
LOADING & DELIVERY
General
393.100 The regulations in this subpart are applicable to trucks, truck tractors, semitrailers, flat trailers, and extendable trailers.
“Prevention against loss of load. Each commercial motor vehicle must, when transporting cargo on public roads, be loaded and equipped, and the cargo secured, in accordance with this subpart to prevent the cargo from leaking, spilling, blowing or falling from the motor vehicle.”
The following are special procedures that should be followed during shipping:
- Panels shall be loaded according to the handling instructions and loading diagrams with the dunnage located properly.
- Loading diagram/instructions provided by the Loading Foreman shall match what is shown on the handling instructions shown on the shop and field drawings.
- All products (except double tees) shall have a minimum of two (2) nylon straps or chains while being transported from the plant to dry finish area and from storage to transportation staging area. Double Tees shall be set on notched 8×8 crossties or metal beams with side clips that are fastened to the trailers or shall have two (2) nylon straps or chains to prevent the load from moving.
- Soft spacers shall be used on panels that have a plastic form liner in face of panel.
- Corner guards shall be used on all products with square corners.
- Panels without form liners shall use bubble pads on top of dunnage. (For use when transporting from the plant area to sand blasting area)
- If it is necessary to ship a load with only one (1) precast unit on a set of frames, offset toward the left side of the trailer as viewed from behind. The amount of offset will depend on the size, weight, and configuration of the panel and will be shown on the load diagram. Single piece loads will always be loaded on the curbside of the shipping frames.
- Units shall be shipped in an appropriate shipping rack to ensure the capacity of the rack is not exceeded.
Normal Loads
(no permit is required) can be up to 8’6” wide, under 13’-6” high and total gross weight (truck + trailer + load) is 80,000 Lbs. or less (an overweight permit can be obtained if the weight exceeds the 80,000 lbs. limit).
Standard Loads are loads that:
- Can be directly secured to the bed of the trailer.
- Can be symmetrically loaded on a trailer while maintaining balance during transport regardless of the use of racks.
Non-Standard or Specialty Loads are loads that:
- Cannot be symmetrically loaded on a trailer and are unbalanced while being transported, thus requiring the proper placement of Counterweights.
- Any load that needs special loading or securement details from the Engineering Department
How to Secure Loads
No panel shall be loaded, transported, or shipped free standing in a manner that does not comply with the 2:1 height to width ratio rule. This means that a panel cannot be placed on edge when the width of the base is one half or less than the height of the panel. All racks are to be secured to the trailers using
¾” coil rod with (2) nuts jammed together on the bottom.
The following explains how panels shall be secured when being transported using A-Frames, Lay-Down Racks, or lying flat on the trailer.
A detailed description of each rack type along with the maximum limits for length, height, and weight are in Appendix C. These limits should not be exceeded without the expressed written consent from the Engineering Manager. If exceptions are granted for specific units, this information should be displayed in a prominent location. Verify that the load satisfies DOT regulations for length, Width, height, and weight limitations.
A-Frames
- Panels can be shipped as multi-piece loads on standard A-frame racks secured to the trailer 3/4 “diameter coil bolt passing through the rack, trailer stake pockets, a piece of 3″ channel and (2) nuts that are then jammed together using (2) wrenches.
- A-Frames are placed at an appropriate location from each end of the panel, as noted on the panel handling instructions or as otherwise directed by the Engineering manager.
- Appropriately sized chains are placed over the panels and hooked into the stake pocket on each side of the trailer. The long chain is then hooked into the end of a binder.
- Plastic corner protectors are placed as required to protect the panel and the binder tightened to secure panels to the A-Frame.
- When unloading symmetrical loads, the second piece must be secured to the rack and the landing gear must be down before unloading the first piece.
- Chains are to be placed within one (1) foot of the A-Frames. Chains shall meet or exceed DOT regulations contained in section 393 Subpart I-Protection Against Shifting and Falling Cargo.
- If it is necessary to ship a load with only one (1) panel on a set of A-Frames, the trailer set-up is like that noted above, except that the A-Frames are offset toward the left side of the trailer as viewed from behind. The amount of offset will depend on the size, weight and configuration of the panel and will be shown on the load diagram for special cases. One-piece loads will always be loaded on the curbside of the trailer.
- Consult the Yard Supervisor or Engineering Manager if any of the above items are unclear.


Lay-Down Racks
- Panels that are too tall for shipment on standard A-Frames can usually be shipped on lay- down racks that support the panel at about a thirty-six (36) degree angle to the trailer bed.
- Racks are secured to the trailer similarly to the A-Frames but shall have two (2) 3/4” bolts at each end of the lay-down rack and have chains fastened to the high side of the lay-down rack and extending downward to the trailer rail at about forty-five (45) degree angle on both sides of the lay-down rack. This is to provide additional restraint for lay-down racks when starting and stopping (See Appendix C). Chains shall be angled with the ratchet binders to the side of the trailer.
- The procedure for securing panels loaded on lay-down racks is like that stated above, except that additional corner protectors shall be used to protect the rack side corners when the panel overhangs the trailer. Lay-down racks should always be placed so the bottom edge of the panel is curbside like the one-piece load A-frames.
- Binders should always be connected to chains and never directly to stake pockets.


Flat on Trailer
- Appropriately sized chains are placed over the product and hooked into the stake pockets on each side of the trailer. The long chain is then hooked into the end of a load binder.
- Plastic corner protectors are placed as required to protect the panel and the binder tightened to secure panels to the trailer. Plywood forms shall be placed under ratchet binders to prevent damage to the precast piece.
- The number of chains required is based on the weight and length of the load and is specified in DOT 393.100.
- Chains shall meet or exceed DOT regulations.
Flat on deck
1.) The number of chains used to secure the load shall be one more chain than is required by standard FMCSA standards for cargo securement.
2.) Chains should only be placed over the product where there is dunnage underneath the load. Placement of chain anywhere else over the product can result in damage.
Points to Remember:
- All chains must have edge protection where it touches the panel.
- The front most chain on the load should be at nearest stake pocket of the first block of dunnage.
- Rear most chain on the load should not be further back than the last block of dunnage.
- Any load wider than 102 inches will require oversize load permits. Requirements for these loads can vary from state-to-state depending on dimensions and weight.
- Be sure all required oversized signage and equipment are properly installed. This may include but is not limited to flags, banners, and strobe lights.

Flat on Deck – Wall Panels
To ensure a product shipped flat is secured, it must be cross chained as described below. This will ensure the product cannot slide from side to side or front to rear.
This can be accomplished by using any of the following:

MetroDeck
1.) The number of chains used to secure the load shall be one more chain
than is required by standard FMCSA standards for cargo securement.
2.) Product must all be secured with chains only on
the front and the rear of the product directly above the dunnage.

- Points to Remember:
- Chains not directly above the dunnage points must be avoided to prevent damaging the product.
- A trap chain must be used at the front of the load to prevent the product from forward motion.
- Edge protection must be used anywhere the chain comes into direct contact with the concrete.
- Any load wider than 102 inches will require oversize load permits. Requirements for these loads can vary from state to state depending on dimensions and weight.
- Be sure all required oversized signage and equipment are properly installed. This may include but is not limited to flags, banners, and strobe lights.
Double Tees
1.) The number of chains used to secure the load shall be one more chain than is required by standard FMCSA standards for cargo securement.
2.) When possible, all chains used to secure the freight should pass through the conduit pockets made into the vertical portions of the T. Only use the conduit pockets that are directly above the supported dunnage.

- Points to Remember:
- Chain over the whole piece should be avoided if possible. If a driver must go over the whole piece care must be taken not to over tighten that chain. The outer wings of the double T will NOT support a great deal of weight and can easily be damaged. A chain can be used over the top only to display flagging, not tightened to support the load.
- Edge protection must be used anywhere the chain comes into direct contact with the concrete.
- Any load wider than 102 inches will require oversize load permits. Requirements for these loads can vary from state to state depending on dimensions and weight.
- Be sure all required oversized signage and equipment are properly installed. This may include but is not limited to flags, banners, and strobe lights.
Stadium Stairs
- Chains should only be placed over dunnage supporting the load.
- Total amount of chains needed shall be at least one more chain that is required per FMCSA guidelines.
Points to Remember:
- Edge protection must be used anywhere the chain comes into direct contact with the concrete.
If the load is oversized be sure all required oversized signage and equipment are properly installed. This may include but is not limited to flags, banners, and strobe lights.
Columns
- 2 chains should be placed over the first 5ft of the load, then one additional chain only at the dunnage points.
- A chain must be placed around the front of the load to help prevent forward motion.

- Points to Remember:
- Edge protection must be used anywhere the chain comes into direct contact with the concrete.
- If the load is oversized be sure all required oversized signage and equipment are properly installed. This may include but is not limited to flags, banners, and strobe lights. Proper load securement is achieved by the driver placing 5/16” chains in the proper places as
shown in the following photo for columns hauling.
The DOT requires that load securement must be equal to half of the total weight of the load. Also, they require one securement every ten feet or at all dunnage points.
OVERSIZE LOADS
Each state has laws that define legal dimensions for loads. Any load greater than these state set limits makes the load oversized. These oversize loads must be permitted to be legally transported. There are five basic types of oversize loads:
Over Height Loads –
Loads higher than the legal limit. For most states this is 13 feet 6 inches but could be more depending on the states in which you are running.
Over Width Loads –
These loads are wider than legally allowed. For most states this is 102 inches. Metromont trailers are 102 inches wide, so any load that is wider than the rub rails on the trailer makes the load oversize.
Over Length Loads –
The rules for legal load length vary greatly from state-to-state. Any load longer than 53 feet could be oversize depending on the state in which you are driving.
Overhanging Loads –
Many states have limits on how far a load can hang over the front and rear of the trailer. This varies from state to state. The most common regulation is up to 4 feet off the rear of the trailer (some states are less).
Overweight Loads –
If the combined weight of the truck, trailer, and load is greater than 80,000 pounds the load is oversized.
Additional Equipment Required on Oversize Loads
Hauling an oversize load will require additional equipment. What is needed will vary depending on the dimensions of the load and the state it is being transported through. Required additional equipment will be listed on the load permits issued by the state. This includes but is not limited to the following:
Oversize Load Banner-
7ft x 1.5ft yellow banner with 10-inch black letters reading “OVERSIZE LOAD”. “WIDE LOAD”
Banners are not legal in many states. Be sure to have the proper banner.
Safety Flags-
These are 18-inch square red flags. These may be required on the front corners of the tractor, on the corners of the load, or at the rear of the load depending on permit requirements. These can be mounted to the tractor or load in different ways.
Beacon Lights-
Rotating or strobing yellow lights than may need to be mounted on both the top of the tractor and the load.
Pilot Cars-
Some loads that exceed certain dimensions may require the use of pilot cars or escort vehicles. They assist the driver in moving down the highway by spotting problems, obstacles, and interferences and communicating with the driver through the use of a CB radio.
Permits
Oversize load permits will be obtained by operations before the load moves. The driver must keep a copy of this permit in his truck while hauling the load. Always read your permits carefully to ensure compliance with state laws for oversize loads. This includes the following:
- Requirements for additional equipment and placement of these devices.
- Legal moving hours – Many loads will be restricted to daylight hours only. A driver will need to plan his or her trip with this in mind.
- Routing- Some loads will require you to take exact routes to get to your destination. These routes are planned to avoid heavy traffic, narrow roads, narrow and weight restricted bridges, low clearance obstacles, and other problems that may not be obvious.
- Any load over 8’ 6” wide requires flags at the widest point of the load front and rear. Also, a
- wide/overside load sign must be displayed front and rear on the tractor and trailer.
- Wide load/overside load must only be displayed when you are loaded. Make sure not to obscure your tag as it could create a citation for non – display of license tag.
- Red flags are placed at the widest point of load on front and rear. Florida requires flags on tractors, also.
- Holidays may have additional time constraints.
Oversize Permit Required Loads are as follows.
- 8’6-1/4” to 12’ wide and up to 14’ high, weight of 80,000 Lbs. gross (10’ permit)
- 12’ to 14’ wide and up to 14’ high and up to 102,000 lbs. gross (12’ permit)
- Escort vehicles are required Front & Rear on undivided roads.
- Escort vehicles require Rear only while on Interstate.
- Greater than 14’w or greater than 14’ high or greater than 102,000 lbs. gross (Super Load)
- Escort vehicles are required Front and Rear on ALL roads. The front Escort MUST have the height warning pole attached.
On The Road
Each type of oversize load presents different challenges to truck drivers. Here are a few things to consider:
- All oversize loads must stop at ALL open weight stations and present the permits for the loads. This will increase the chance of inspection by DOT officers.
- Wide loads will hang into adjacent lanes and over the shoulder of the road. A driver must watch traffic, as well as roadside hazards such as parked vehicles, utility poles, and mailboxes that are close to the edge of the road.
- Long loads take much more room to turn than legal sized loads. This will require more space to swing wide. This swing can create situations in which traffic moves beside the trailer during the turn. A driver must have a good circle of awareness and keep his or her eyes moving to see developing problems.
- Overhanging loads create tail swing. A tail swing is a side-to-side motion that can be outside the path of the wheel while the trailer is turning. Drivers must compensate for this when turning and when in reverse.
DROP LOT TO ERECTION SITE
Consideration for transporting pre-cast products from a Drop Lot to the Erection Site:
- Extra cribbing may be required under the trailer’s landing gear if soft ground conditions exist.
- All products shall be properly secured with a minimum of two (2) nylon straps or chains with corner guards to prevent any product shifting while being transported from the Drop Lot to the Erection Site.
- If required to travel on DOT regulated roads, loads shall be secured per DOT requirements.

Metromont CDL Driver Checklist
| Checklist | ITEM | Additional Info |
| Must Have in Truck | ||
| Backup Paper Log Book | Do not exceed 8 days of use | |
| Functional Samsara Device | Phone or Tablet | |
| Forward Reverse Camera | Must be functional and unobstructed at all times | |
| Valid CDL Licence | Must be with driver at all times do not operate vehicle without it. | |
| Valid Medical Card | Must be with driver at all times do not operate vehicle without it. | |
| Drivers Booklet | Must have permits, Registration, Insurance Card, IFTA Card, Trip Sheets | |
| PPE | Hardhat, Glasses, Vest, Gloves, Steel toe boots. | |
| Fire Extinguisher | Must be in Charge on guage and in proper bracket | |
| Safety Triangles | ||
| Tire Guage | ||
| Glad Hand Tire Inflator | ||
| Spill Kit | ||
| Must Have on Truck | ||
| Wide Load Banner | Must be removed when load isn’t oversized | |
| Functional Strobe Light | Must be visible from all sides of the vehicle | |
| DOT Numbers on Doors | ||
| IFTA Stickers | ||
| Chains and Binders | ||
| Edge Protectors | ||
| Ratchets and Straps | ||
| Pre-Trip | ||
| Truck and Trailer Lights | All must be functioning before travel | |
| Check for Air Leaks Truck and Trailer | No travel with any noticiable air leaks | |
| Tires and Pressures | All tires must be inspected for both truck and trailer | |
| Axle Hubs | Check all hubs for leaks | |
| Proper Bumpers Truck and Trailer | ||
| Inspect all crossmembers on trailer | ||
| Perform visual brake pad check on Trailer | ||
| Check 7-way for damage |


SUMMARY OF KEY POINTS
- The driver shall perform a visual inspection of all loads and install the appropriate number of chains as required by DOT on all standard piece loads. The driver will ensure the proper quantity of chains are used as needed and are adequately secured to the trailer for non-standard or special loads.
- The driver must comply with all regulations noted on your permit such as time, weight, size and restrictions.
- The driver is responsible for securing Standard Loads in accordance with all applicable DOT, State, Federal and company policies.
- The driver is responsible to visually inspect chains/ratchets before use and make sure they are stored and clean correctly after each use.
- The driver is responsible for assisting the loading crew in securing Non-Standard or Specialty Loads and ensuring that they are secured in accordance with all applicable DOT, State, Federal and company policies.
- The driver ALWAYS has the right to refuse to accept any load that he/she deems unsafe or is otherwise not in accordance with DOT or generally accepted shipping regulations until a qualified person has determined that safety has been assured.
- Synthetic straps shall NOT be used to secure precast product.
- Ratchet binders are the only binders to be used to secure loads. The use of lever/snap binders is prohibited.
- Binders should always be connected to chains and never directly to the stake pockets.
- In the event of ice, sleet, or snow make certain that dunnage sits on a section of the trailer bed that is as dry and clear as possible to reduce the chance of slippage.
- Verify that the load satisfies DOT regulations for length, width, height, and weight limitations.
- When in doubt always consult a supervisor or manager.
- The use of lifting loops, erection anchors and conduit pockets may be used to secure the load.
- Standard Loads are loads that:
- Can be directly secured to the bed the trailer.
- Can be symmetrically loaded on a trailer, thus maintaining balance while it is being transported, regardless of the use of racks.
- Non-Standard or Specialty Loads are loads that:
- Cannot be symmetrically loaded on a trailer and are unbalanced while being transported, thus requiring the proper placement of counterweights.
- Non – Standard Loads, or Specialty Loads shall NOT be unsecured until they are attached to the lifting rigging and are ready to be lifted by the crane at the erection site.
- When unloading symmetrical loads, the piece that remains on the trailer must be secured to the rack and the landing gear must be down before unloading the first piece.
- Empty racks are to be secured to the trailer bed with chains in addition to the racks being bolted to the pockets.
- Only use grade 70 chains of 5/16th inch or larger, supplied by the company, to secure loads.
- GRADE 70 Chains are NOT to be used for rigging panels for lifting.
- Stake pockets are rated for 5,400 lbs. Do not exceed one (1) chain per pocket. Never chain to the rub rail.
- Any chains used to secure a panel from lateral movement shall be in addition to the number of chains required to comply with DOT regulations.
- Chains are to be tight but should not be overtightened to the point that they damage the product.
- The proper number of chains is critical and should adhere to DOT and company requirements.
- Drivers are to ensure the tightness of bolts on ALL racks.
- Remember: Your safety and the Safety other motorist are in your hands.
- Failure to comply with these guidelines could result in disciplinary actions and or termination.
- Your continued efforts and focus to improve our process is greatly appreciated.
SHIPPING MANUAL ACKNOWLEDGEMENT FORM
I hereby acknowledge that I have received and read a copy of the CDL Driver Training Reference Manual and agree to comply with the policies and procedures contained in the manual. Any questions that I had were adequately answered by my supervisor. In addition, I agree to attend all required training related to this manual.

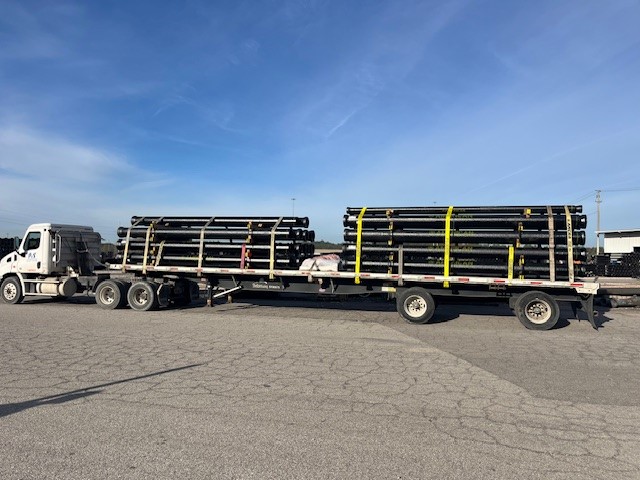
US Pipe
Ductile Iron / Cast Iron Pipe
Freight should never be moved on Yard Without minimal securement.
Driver is expected to exit cab with proper PPE:
- Hard Hat
- Safety Glasses
- Safety Vest
- Long pants
- Closed toed shoes
- These loads are commonly loaded in two sections.
- Each section of pipe must have a minimum of 4 straps.
- Placing straps next the dunnage will create more stability.
- Placing Belly straps on the load is recommended.

- Gaskets and lube may accompany load. Gaskets must be in secure packaging and strapped down to the trailer. The Lube can be placed in side box for secure transportation.

- Note: When strapping and unstrapping load, always check for unsecure chocks. If packaging is not sufficient, notify shipper / loaded. If additional assistance is needed, contact Safety Department.
” Tips for Stuck Straps at Delivery “
On a hot sunny day when the pipe paint/coating gets hot and sticky, it can be an issue causing the straps to stick to the pipe coating. Most of the time a good wallop against the strap with the binder bar between the pipe layers breaks it loose but not always. Sliding an edge protector pole upward between the strap and the pipe is another thing to try but if it is stuck to the center pipe also, then that won’t always get it loose either. In that situation the best option is to take the strap loose and off of the winch, tie one of your portables or an extra 4” strap to it, and then throw that strap back across the top of the load, then you can pull both straps across the pipe pealing the stuck strap off of the pipe, always avoid climbing down the sides of the trailer or on top of the pipe trying to get it loose.
Arconic

PPE
- PPE must be worn anytime driver is outside of his/her truck
- Hard hat
- Safety glasses with sides
- Shirt with sleeves
- Safety vest
- Long pants
- Closed toe shoes
Arconic Coils – Eye To Sky and Suicide
- After checking in with guard shack you will review Arconic safety policies then you will be sent to the shipping department.
- After the shipping Dept backs you into the correct loading bay you will need to apply safety rails to your trailer.
Eye To Sky (palletized)
- Always lay rubber matting on the deck on the trailer for coil to be set on.

- All Eye to Sky coils must have a trip strap on them to help with forward movement.

Eye To Side (suicide)
- When loading suicide coils always put down rubber matting, coil racks, beveled timbers, then rubber matting on top of timbers.
- Arconic requires drivers to only use beveled timbers.
- Driver must add at least 1 securement device to each coil before pulling out of the loading bay.

- Suicide coils must have 2 straps crossed over the top of coil to help with forward movement.
Fall Protection
- Drivers with Conestoga trailers can’t be on the deck of the trailer unless the curtain is closed.

- Drivers with Flatbed trailers can’t be on the deck of the trailer unless they are in the tarping bay.
- After loading all drivers must contact the guard shack for instructions either by radio or by phone.

- When on plant property obey all posted speed limit signs and always stop at Railroad crossings.

American Cast Iron Pipe Birmingham, AL
- Turn off of Daniel Payne Dr. onto 32nd Ct W. to enter the facility. Speed limit is 15 mph.

- You will come to the security building, at that point stop and give the guard a wave then proceed unless he opens the window and ask you to stop.
ACIPCO requires all drivers to wear PPE before exiting the truck
- Hard Hat
- Safety Glasses
- High Visibility Vest
- Closed toe shoes
- P&S Policy: Driver must wear long pants
- Once you leave the scale the Speed limit will remain 15 mph throughout the facility
These yards and shippers are located across from the scale house.
- A-yard
- F-yard
- Gasket warehouse
- Vulcan Painters
- L.B. Foster
If loading at one of these yards, when you exit the scale and enter the road and make a right turn and go down the hill.


If you need to load at yard B C D E Z or Steel Pipe, when you exit the scale and enter the roadway go straight for approximately ½ mile go down the hill to the stop sign. Turn right for Yards B C D E & Z or turn left for steel pipe loading.

- If you make the left for steel pipe loading, you will see the Loaded trailers on the left and right side of the road.
- Most of these loads are pre-loaded


After you get your gaskets, you can pull forward and off to the side to finish strapping, or after you scale out, you can pull off to the right about 100 yards past the scale to finish up.
Points to Remember
- You must always scale in, even if picking up a pre-load
- Always follow signs to loading area when entering the yard where your product is located.
- Always obey all signs and speed limit
- ACIPCO requires all drivers to wear PPE before exiting the truck
- Most of the time (unless you are loading steel pipe) you will be required to go to the warehouse located in yard A for gaskets.
- You must scale out to receive your paperwork.
” Tips for Stuck Straps at Delivery “
On a hot sunny day when the pipe paint/coating gets hot and sticky, it can be an issue causing the straps to stick to the pipe coating. Most of the time a good wallop against the strap with the binder bar between the pipe layers breaks it loose but not always. Sliding an edge protector pole upward between the strap and the pipe is another thing to try but if it is stuck to the center pipe also, then that won’t always get it loose either. In that situation the best option is to take the strap loose and off of the winch, tie one of your portables or an extra 4” strap to it, and then throw that strap back across the top of the load, then you can pull both straps across the pipe pealing the stuck strap off of the pipe, always avoid climbing down the sides of the trailer or on top of the pipe trying to get it loose.
Gold Bond Building Products
Gold Bond Building Products
Gypsum Board Plant
Westwego, LA

Westwego requires all drivers to wear personnel protective equipment before exiting the truck
- Hard Hat
- Safety Glasses
- Safety Vest
- Gloves
- Steel Toed Boots
- Long Pants
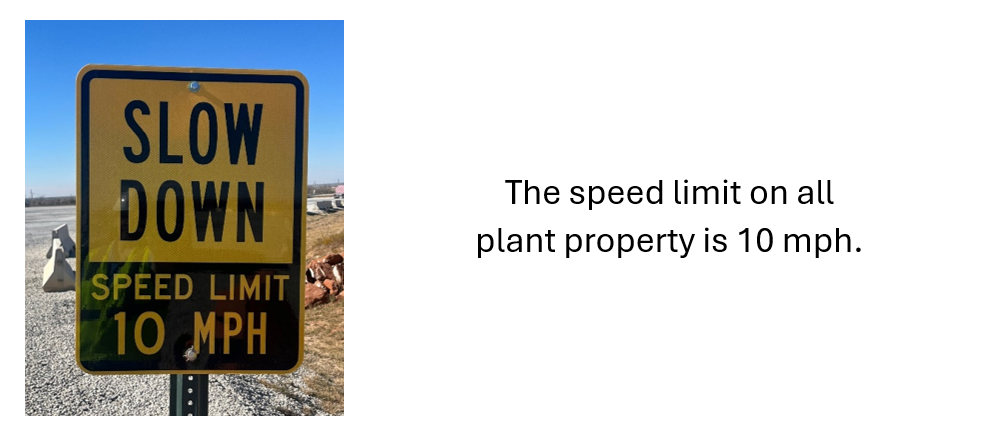
Speed Limit on all plant property is 10 mph. Please watch out for employees traveling by bicycle and walking along the main road.

Receiving a Load:
- Upon entering the gate, turn to the left and proceed to the end of the road.
- Drop your empty trailer on empty lot.
- All drivers must leave:
- 2 Tarps
- 14 Edge Protectors
- 30 bungees
- Please send a photo of the empty trailer with securement equipment to your DM.

- After you have dropped your empty trailer, check the P&S mailbox for your load paperwork. The mailboxes are located directly in front of the entrance gate.

- If your paperwork is not in the mailbox, please check in with the shipping and receiving department and let them know you are on site.
- When following the signs to the shipping and receiving department, the office door will be to your left at the top of a concrete ramp.


- All loads at Westwego are wrapped in plastic and tarped by a 3rd party company. Before leaving with the load, please ensure:
- There are the correct number of straps on the load as required by P&S.
- Load check should occur within first 50 miles of travel.
- Additional load checks should occur with each additional 150 miles or 3 hours; whichever comes first.
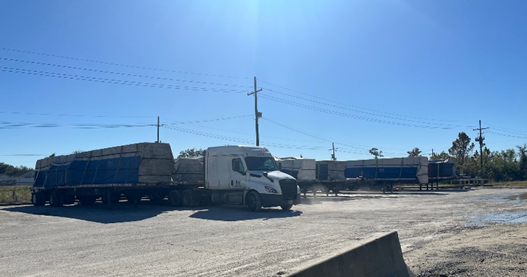
USG Otsego Paper Mill
USG Otsego Paper Mill 320 N Farmer St. Otsego, MI 49078 Paper Rolls
10 4-inch Straps, 20 bungees, 2 Lumber Tarps
Required PPE High-visibility vest, shirt, or jacket Safety glasses Hard Hat Gloves
Drop and Hook
- Upon arrival, driver must check in with his/her pick up number at the shipping office located beside the loading bays on the east side of the warehouse.

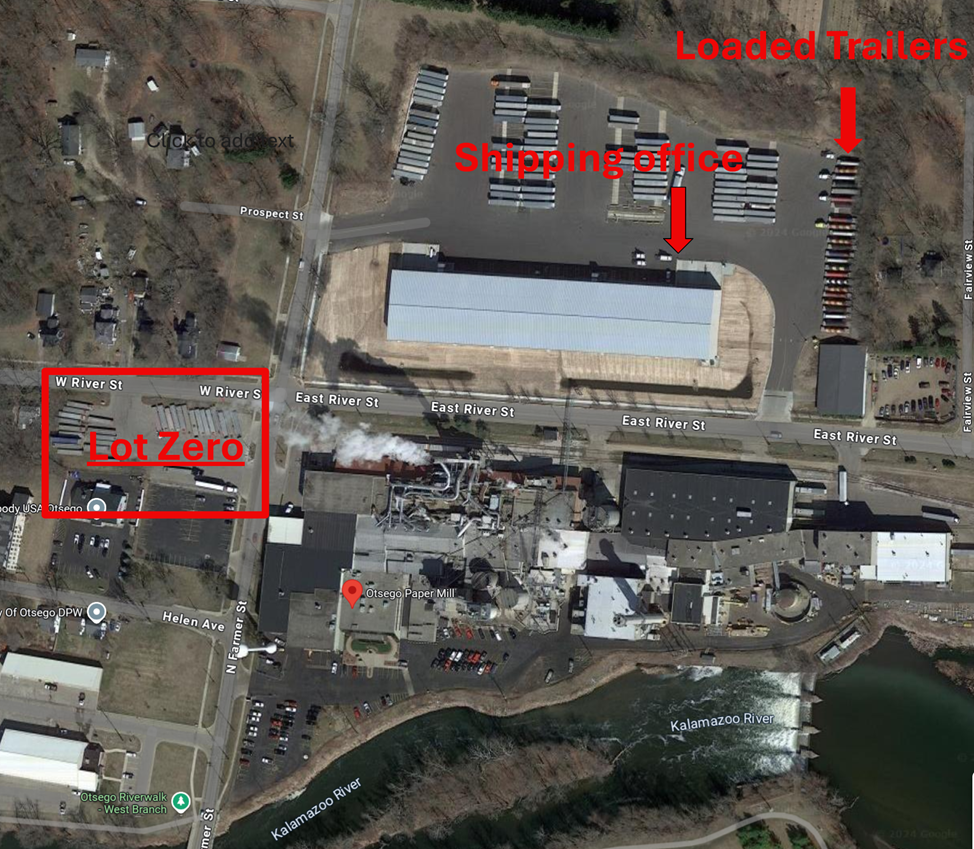
- Empty trailers are dropped in Lot Zero, located Southwest of the main warehouse.
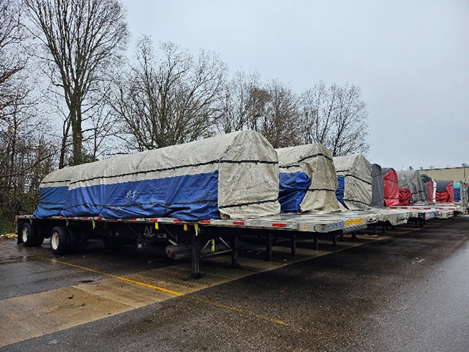
- Leave 2 lumber tarps, 20 bungees, and 10 straps on the trailer

- Locate loaded trailer on the eastern side of the main warehouse parking lot. Loaded trailers may be down on Lot Zero if additional parking is required.
- Check securement. 2 straps should be over the first and last rolls. One strap over each interior role.
- Check the tarps. Additional bungees will likely be required to secure the tarps for travel.
- Once hooked up, return to the shipping office for bill-of-laden.
Live Load
- Upon arrival, driver must check in with his/her pick up number at the shipping office located beside the loading bays on the eastern side of the warehouse.
- Shipping office will advise the driver where to drop the trailer. This is usually done in Lot Zero.
- Leave 2 tarps, 20 bungees, and 10 straps on the trailer.
- Shuttle Service will pick-up empty trailer, take it to the loading bay, and load, secure, and tarp the load. It will then be dropped in the loaded trailer zone on the eastern end of the parking area.
- Locate loaded trailer on the eastern side of the main warehouse parking lot. Loaded trailers may be down on Lot Zero if additional parking is required.
- Check securement. 2 straps should be over the first and last rolls. One strap over each interior role.
- Check the tarps. Additional bungees will likely be required to secure the tarps for travel.
- Once hooked up, return to the shipping office for bill-of-laden.
Pickup and Delivery Contractor/Customer Plant Safety Rules
- Truck drivers must remain in the plant designated area for truck drivers at all times.
- Comply with posted signs and signals.
- Tarping and tie-down should be done in designated areas only.
- No parking on ramps at any time.
- All passengers and pets must remain in designated waiting area or in vehicle at all times when inside plant area.
- When pickup or delivery is complete, leave the premises immediately. No Loitering. No overnight parking.
- No unauthorized vehicles permitted in plant area.
- Facilities are limited to those provided in the truckers’ waiting area. All other areas of USG premises are exclusively for USA employees.
- Always use handrails when going up or down stairs or inclines.
- “Horseplay” is not permitted on plant property.
- Use only appropriate ladders, step stools, and stairs to gain access to equipment and facilities above ground level.
- Seat belts must be worn at all times while operating mobile equipment (including trucks).
- Never approach mobile equipment while it is in operation. First attract the operator’s attention and have them shut down the equipment, then approach and converse with the operator.
- Running is not permitted in the plant.
Violation of any of the following rules will result in disciplinary action as detailed in the plant’s customer/contractor’s safety program.
Charlotte Pipe and Foundry Company
- PVC
- Huntsville, AL
- Wildwood, FL
- Maize, KS
- Monroe, NC
- Cameron, TX
- Steel Cast Iron
- Oakboro, NC
Loading of material
- All of the loads will be pre-loaded
- All PVC and Steel Cast Iron pipe must be belly strapped
- A rope is placed between the pipe to assist will pulling the belly strap through the material
- All PVC and Steel cast Iron pipe must be strapped with 4-inch straps pulling in opposite direction
- Trailers that are equipped with straps all on one side must have belly straps pulling in opposite directions
PPE is Required
- Exit truck with PPE already on and ready to work
- Hard Hat
- Safety Glasses
- Safety Vest
- Gloves
- Steel Toed Boots
- Long Pants
Plant Transfers
- Plant Transfers will be drop and hook
- Wildwood, Florida requires that you check into the shipping office during business hours
- Once dropping the trailer, unhook all your straps


Belly Straps:
CPF will slide rope in place of belly straps for driver to easily place in the belly straps

For final straps driver should alternate strap application/tightening, alternating from tightening on right to left, to keep load centered on the trailer.
Departing shipper
- Load check should occur in advance of the 50-mile requirement to make sure pipe has not moved or shifted
Georgia-Pacific Gypsum Sweetwater, TX

The GP Sweetwater plant has two entrances for loading. If your order number begins with 414 follow signs to the West gate. Order numbers beginning with 204 are loaded at the East gate.
Georgia- Pacific East Gate Instructions
If your order number begins with 204 follow signs to Gate #4.


After hooking to your pre-loaded trailer, please proceed to the securement area past row H to fully secure your load.
- Each bundle should be secured with two 4-inch straps.
- Two additional straps should be used in a X pattern over the front and rear face of the load (Orange straps in Figure 1)
Points to Remember:
- Foam insulation board is tall but very light. Failure to X strap the front and rear of the load can result in damage to product and cargo shifts.
- Edge protection must be used to avoid damage to the product caused by straps.
- Be mindful that over-tightening straps can cause damage to the product.

*** All loads shipping from this location MUST be fully tarped***

Georgia-Pacific West Gate Instructions
If your order number begins with 414 follow signs to Gate #1.


.After you receive your paperwork, you can drop your empty prepped trailer on the right side of the yard and pickup your pre-loaded trailer from the left side.
Securing the Load
- Each bundle should be secured with two 4-inch straps.
2. Two additional straps should be used in a X pattern over the front and rear face of the load (Orange straps in Figure 1)
Points to Remember:
- Foam insulation board is tall but very light. Failure to X strap the front and rear of the load can result in damage to product and cargo shifts.
- Edge protection must be used to avoid damage to the product caused by straps.
- Be mindful that over-tightening straps can cause damage to the product.

*** All loads shipping from this location MUST be fully tarped***
Please stop at the guard house when exiting so the guard can confirm you have the correct trailer before exiting.
Port of Panama City, FL
Copper
- Driver will check in at the guard shack.
- Safety Vest is required to be worn at all times while at the port.
- Driver should have TWIC and Port Pass ready to hand over.
- If you do not have a TWIC, the guard will instruct you to pull around to escort waiting. Do not move around the port, unless instructed to by your escort.
- Driver will then be instructed by the guard to either proceed to staging or to overflow.
- Once in the staging area you will need to put out your dunnage to be loaded.
- Be mindful where you place your dunnage, as this is where the loader is going to place the copper.

- The copper should be loaded in stacks two wide on the trailer.
- Each section will require 2 straps and 4 edge protectors.
- Copper is expected to run straight through from the shipper to the customer, without stops, within the means of the regulations set forth by the Federal Motor Carrier Safety Administration.
- If adhering to this rule will cause any issues with maintaining compliance with the FMCSRs, the driver should immediately alert the company so that other plans can be made.
- The only place drivers are permitted to stop with a load of copper is at the Shelton terminal in Altha, FL.
- 10 hour breaks or splits should only be taken at the Altha terminal or at the customer. Proper route planning is a part of the driver’s responsibility, and drivers are expected to decline this load assignment if they will not have the hours to make it to either the customer or Altha terminal.
- If, while under dispatch, an event occurs that will hinder a driver’s ability to deliver safely (mechanical breakdown, etc) then it is the driver’s responsibility to immediately notify their Driver Manager. The Driver Manager will provide instructions on how to proceed. They will confirm these instructions via telecom (samsara message) to protect the driver and ensure proper precautions are taken.
- We expect drivers to conduct adequate pre and post trip inspections that will minimize these occurrences. Picking up copper with a known DOT violation (or any freight for that matter), is not acceptable.
- It is the driver’s responsibility to ensure they have adequate fuel to complete delivery prior to loading.
- Driver should stop at the Altha terminal after loading if their HOS will not permit them to run the load straight through and remain in compliance.
USG Sweetwater, TX

USG requires all drivers to wear personnel protective equipment before exiting the truck.
- Hard hat
- Safety Glasses
- Safety Vest
- Gloves
- Steel Toed Boots
- Long Pants
Drivers should leave two tarps, 20 edge protectors and 40 bungees on their dropped trailer.


At the entrance to the marshalling yard, there are mailboxes located inside the yard office. Please check the P&S mailbox for the paperwork for your pre-loaded trailer.

Standing on the trailer deck is prohibited on USG property.
After hooking to your pre-loaded trailer, please fully secure your load.
- Each bundle should be secured with two 4-inch straps.
- Two additional straps should be used in a X pattern over the front and rear face of the load (Orange straps in Figure 1)
Points to Remember:
- Foam insulation board is tall but very light. Failure to X strap the front and rear of the load can result in damage to product and cargo shifts.
- Edge protection must be used to avoid damage to the product caused by straps.
- Be mindful that over-tightening straps can cause damage to the product.

*** All loads shipping from this location MUST be fully tarped***

Arrival
Approach Steel Dynamics off Airport Road
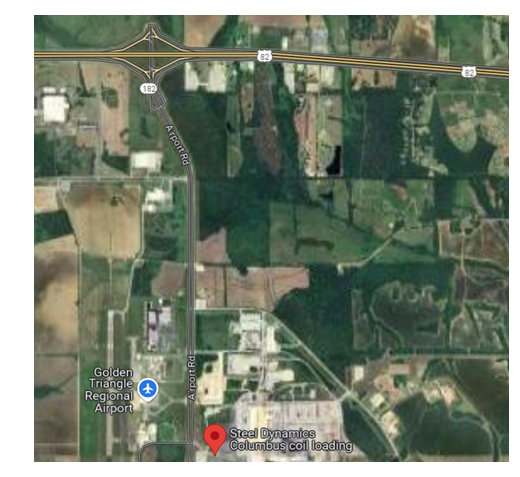
Enter at location indicated below.

Upon entry into facility, you will be required to weigh your truck and check in.
PPE is required to be on prior to exiting your truck.
| Steel Dynamics PPE Requirement |
| Steel Toed Shoes |
| Safety Vest |
| Hard Hat |
| Safety Glasses |
| Long Pants |
Checking in
A test will be given to each driver to make sure that you can read and comprehend safety signs at the facility. You must pass this test to proceed with loading.
Once you pass, a hard hat sticker will be provided, and you will not need to take a test in future.

Important:
At no time will you be allowed on top of your trailer without fall protection in place.
SDI will provide drivers operating open deck trailers with aluminum railing that must be placed in the side rails of all flatbed trailers.

1. Conestoga Trucks: These trucks are essentially equipped with fall protection when the cover is closed and locked. Moving forward, we will require that the covers be closed and locked whenever a driver needs to access the trailer, except when spatial limitations prevent this or if this creates some other safety hazards. When exceptions occur, the Conestoga will be treated like a flatbed.
2. Side Kit Trucks: These trucks have fall protection but pulling the side panels creates a fall risk. To minimize this risk until a secondary fall system is implemented, drivers must keep the side panels in place when accessing the trailer. Panels should only be pulled as the last step before exiting the trailer for coil placement and must be replaced after the coil is loaded, but prior to securing. This practice will significantly reduce the fall potential and will be discontinued once a secondary fall system is in place by the carrier or the facility. When exceptions occur, the Side Kit will be treated like a flatbed.
SDI has a ZERO TOLERANCE for failure to follow on site rules regarding fall protection. This means that you will be banned from the facility if caught not complying.
Loading
Upon check in, you should receive directions on where your truck will be loaded.
If waiting in line to load, this is an opportunity to make sure all side rails are in place.
Once rails are in place, you are now allowed to set up rubber mats, coil racks and timbers as indicated in securement manual.
When truck is in position for crane operator to place coil on trailer deck, it is required for the driver to stand behind the rear of the trailer. Drivers are not allowed to stay in the cab during loading process.
Note: Overhead crane operators are instructed to apply the 10 ft. – 45 degree rule. This means that if they notice a driver within 10 feet or inside of 45 degrees while loading, the process will stop.
Communicate with Crane Operator to make sure he is always aware of your location.
Passengers
At no time will a passenger be allowed out of the tractor without wearing all PPE.
Passengers will not be allowed to stay in the Cab during the loading process.
Securement
After crane operator loads coil onto trailer, Place minimum securement (2 chains) on coils and proceed to securement area.
If driver must get on trailer deck to secure, fall protection must be in place.
Follow weight and chain requirements in cargo securement manual.
Departing Facility
Aluminum railing must be returned to SDI prior to leaving.
Failure to do so will result in a charge for replacement cost.
Driver will be deducted this amount from his check, if he fails to return the SDI rails.
Staging Area / Parking Lot
There is a truck parking area prior to entering the facility. All rules and regulations for the facility apply in this area.
This means, no accessing the trailer deck without fall protection in place.

Greenheck Tulsa, OK
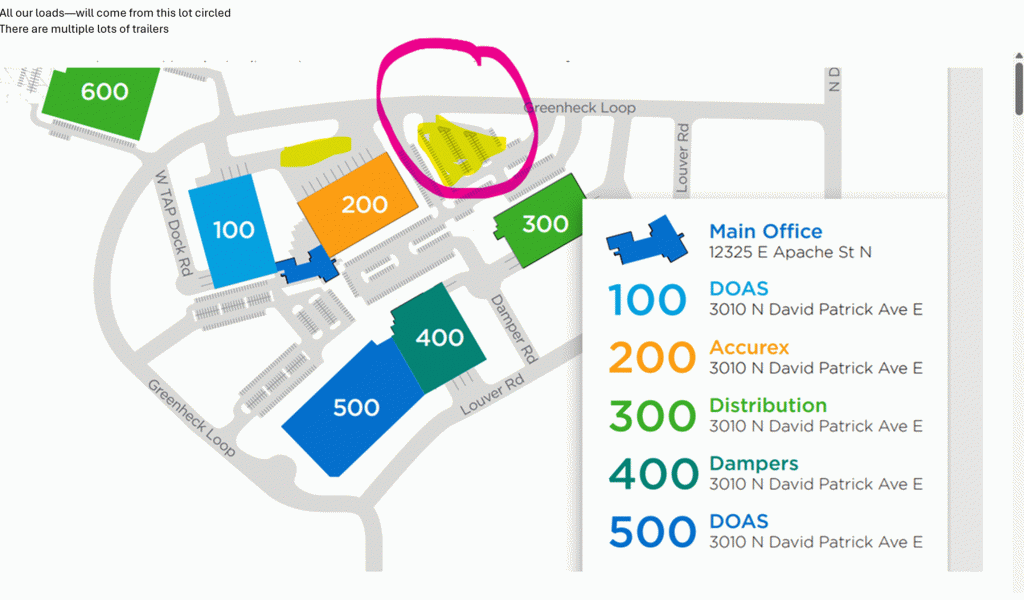
Instructions for Picking Up Pre-loaded Trailers:
Please ensure that all drivers receive clear, step-by-step instructions on our process to avoid any confusion and ensure smooth operations.
Here are the steps drivers should follow:
- Do not check in at any building. Drivers should not check into any building.
- Locate their trailer, which will be parked around Building 200 on the north or west side.
- Park the empty trailer either next to the one being picked up or in an open spot.
- Hook up to the trailer they are picking up.
- Secure the freight
- Retrieve the paperwork zip tied to the front of the trailer.
- They’re good to go.
Map of the Facility in Tulsa, OK – Where to Pick Up Pre-Loaded Trailers:
Securement instructions
- Put chains through the securement points at the bottom of the units
- Make sure your chains have alternate directional pull such as front pulling back and back pulling forward.
- Do not chain or strap the top of the unit.
Post navigation
Nucor Vulcraft Fort Payne, AL
Driver will check in at the guard house.
After check in is complete driver will turn left there will be a platform on the right side of the road this may be used on the way in if delivering a coil or other materials to remove tarp of chains or after loading it may also be used for securement and tarping. This customer wants the ladder pushed up to the back of the trailer to prevent falling off the rear of the trailer.

If you are picking up a load continue past platform and follow signs.
If picking up a preload, you can go straight as indicated on the sign and go ahead and drop your trailer in the area shown below.
If live loading turn left and follow signs to the shipping office, which will be to the left of the scale, driver can park on the right side of the scale to check in the shipping office, the clerk will give you the trailer number you are picking up or if live loading direct you to the building and bay you are loading from.
Preloaded trailers will be directly across from the shipping office on the right side of the scale
Once you have your load you can use the scale if you want but not required, and then continue straight ahead until the road turns left, continue left and just before you get to the scale house there are a couple of securement / tarp platforms one on each side of the road or you can continue back around to the platform that was passed on the way in.
Speed limit is 15 MPH
Points to Remember
- PPE Must be worn while out of truck
- Safety Vest
- Hard hat
- Long pants
- Closed toe shoes
- If you load tarps, it will say Must Tarp on your paperwork, and you will not be allowed out the gate without it. You should let your DM know so you will be paid for tarping.
- You must always use edge protection under your straps whether hauling Joist or decking.
- Chains are allowed on this material with edge protection and at least 2 must be used on stacks of decking. on the front and rear section of the stack.
- Belly straps should be placed in between the middle layers (if the load is 6 layers the bellies should be placed between the 3rd and 4th layers) and can be slid in from the front and the rear of the stack to the dunnage.
- If the decking has dunnage on the top of the material chains can be placed in the slot of the dunnage as shown below.
- If no dunnage on top, then the chains should be on the 2nd layer in front of the dunnage to prevent the material from shifting forward.


Click Here for Instructional Video
EMJ (Earle M Jorgensen) Schaumburg, IL
Points to Remember
- When loading at this facility the driver must build a bulkhead or header board at the front and back of the material.
- The standard bulkheads require 4 stacked timbers, a chain and binder.
- If bundles are different heights, you may need to weave straps to obtain down pressure on each.

